Rated: 4.9 / 5 based on 2,600+ reviews. Read our reviews

Available 24/7! Call now to schedule! (518) 545-3271

4 Homemade Drain Cleaner Recipes

You already know store-bought drain cleaning formulas contain harsh chemicals that can destroy a drain pipe. Did you know you can make a DIY drain cleaner instead of reaching for those toxic chemicals in your cabinet? Grasshopper Heating, Cooling, Plumbing & Electrical offers four homemade drain cleaner recipes below.

Clog that won’t go away?

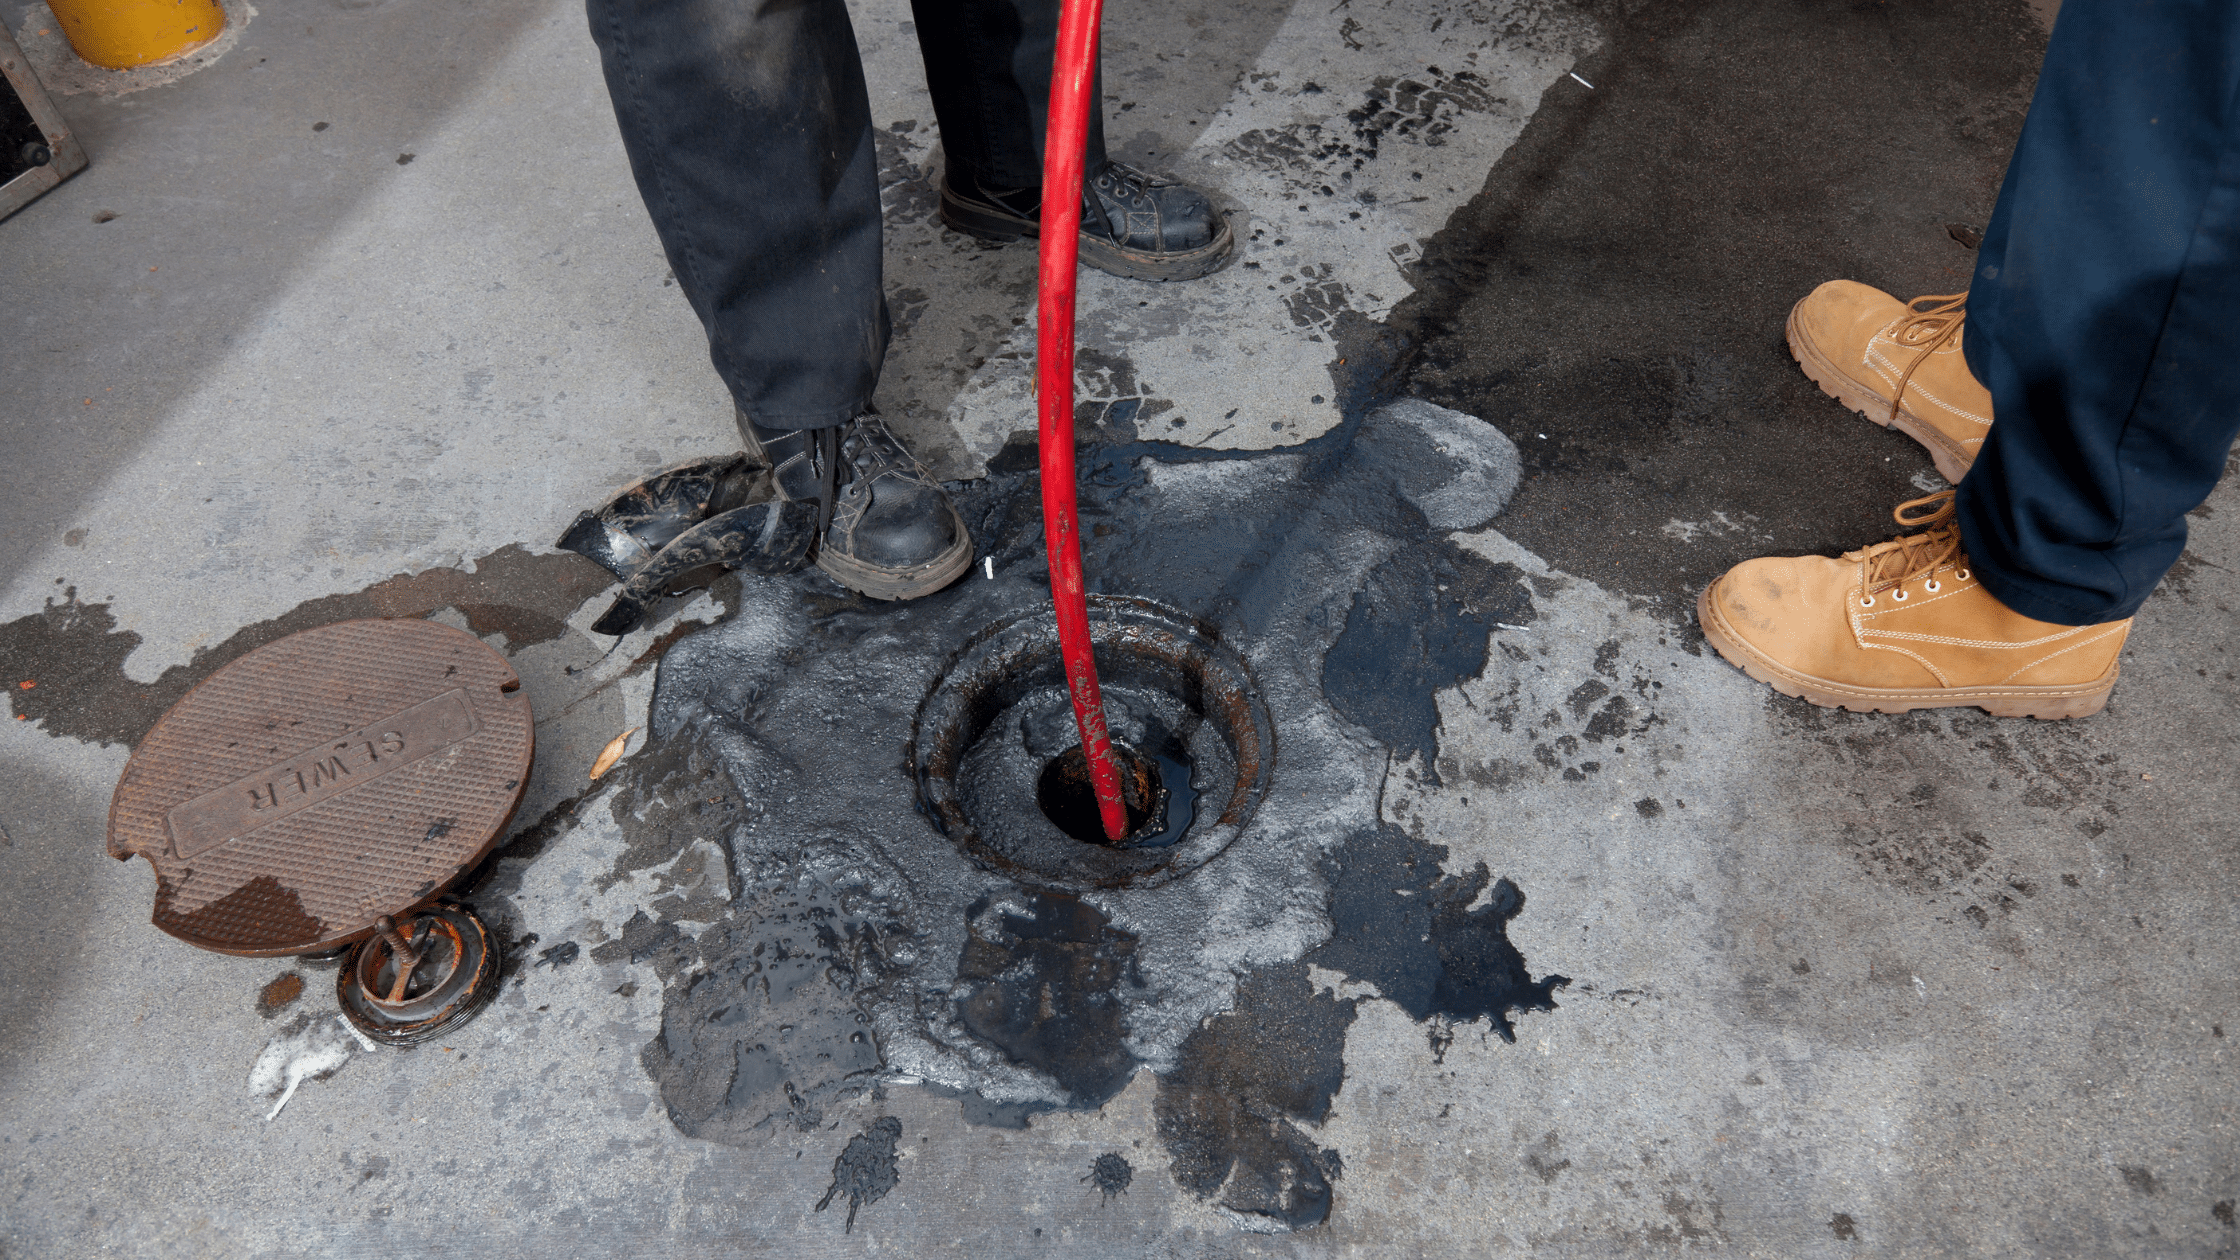
Homemade cleaners handle minor slow drains. If a clog keeps coming back or more than one drain is slow, there’s likely a deeper blockage in the line. Our plumbers offer professional drain cleaning, clogged drain repair, and hydro jetting in Clifton Park, Albany, Saratoga Springs, and surrounding areas.

Call 518-545-3271Schedule a plumber online

Why Use Homemade Drain Cleaners?

While the average commercial drain cleaner dissolves blockages, it also corrodes your plumbing system. Plus, it harms the environment. When it inevitably enters nearby water bodies, it kills bacteria and aquatic flora and fauna.

Before reaching for these products to alleviate slow drains, try a DIY drain cleaner. You’ll protect your plumbing system and the local ecosystem.

Our Effective Homemade Drain Cleaner Recipes

The tough clog in your bathroom or kitchen sink drain might respond just as well to a DIY drain cleaner as a chemical formula. The recipes below use common household ingredients you likely have in your cupboard or pantry.

#1 Boiling Water and Dish Soap

Sometimes, you just need boiling water to dislodge a blockage. If you need extra help, pour boiling water down the drain. Then, squeeze liquid dish soap into it as well.

Wait at least an hour so the soap can dissolve the grease clog. Follow up with another pot of boiling water. Then, you can run hot tap water into the drain until the suds dissipate.

#2 Baking Soda and Vinegar

A combination of sodium bicarbonate or baking soda and white vinegar is incredibly effective at unclogging drains. Run hot water into the affected drain to loosen any trapped debris. Then, pour baking soda directly into the clogged drain.

Next, pour an equal amount of vinegar on top of the baking soda. The baking soda and vinegar will eat away at the blockage. If you can’t find any white vinegar, use lemon juice instead as it reacts similarly.

#3 Baking Soda, Salt, Cream of Tartar

A lesser-known homemade drain cleaner involves:

  • 1/4 cup of baking soda
  • 1/4 cup of table salt
  • One tablespoon of cream of tartar

Mix these ingredients into a bowl. Then, sprinkle the mixture into any clogged drains. After a 30-minute wait, slowly pour a pot of boiling water down each drain. Repeat this DIY drain solution as needed.

#4 Salt, Borax, and Vinegar

As one of the more effective recipes for homemade drain cleaners, this recipe requires borax. Borax is generally considered non-toxic if not ingested. Keep it away from children and animals to prevent any complications.

The recipe calls for:

  • A half cup of borax
  • A half cup of salt
  • A cup of white vinegar

Thoroughly mix the ingredients in a bowl until they form a thick paste. Then pour the concoction into the slow drain, letting it sit for half an hour. Use a rag or drain stopper to cover the clogged sink drain.

Finally, pour boiling water down the drain to loosen remaining debris. If necessary, repeat this homemade drain recipe or add more hot water to your currently clogged drain.

Other Ways to Protect Your Plumbing System

You can prevent clogs, foul odors, and other undesirable plumbing issues with the following accessible tools:

  • Hot water: Pouring boiling water down each drain monthly encourages trapped debris to move along. Hot water liquefies grease and loosens stubborn particles.
  • Drain snake: The drain snake is the champion of DIY drain cleaners. Just push it down a blocked drain and pull it out to see what it catches.
  • Drain trap: Covering your drain with a trap prevents food particles and other materials from entering your drainage system.
  • Wire coat hanger: If you drop a piece of jewelry or another small object down the drain, you can straighten a wire hanger to retrieve it.
  • Baking soda: Not only is baking soda a must-have for homemade drain cleaners, but it can eradicate odors. Pour a cup of baking soda down a stinky drain.

Grasshopper Heating, Cooling, Plumbing & Electrical Can Combat Difficult Clogged Drains

If these homemade drain cleaners don’t work, our services will! Schedule a local Clifton Park plumber visit from Grasshopper Heating, Cooling, Plumbing & Electrical at 518-545-3271.
IS DRANO BAD FOR PIPES

Is Drano Bad for Pipes?

At Grasshopper Heating, Cooling, Plumbing & Electrical, we want to let you in on an industry secret: your professional plumber hates when you use liquid Drano and similar chemical drain cleaners. Homeowners increasingly ask, “Is Drano bad for pipes?” The short answer is yes. These substances can corrode PVC pipes and other parts of your plumbing system.

However, the effects of liquid plumber products go beyond potentially costly repairs. Find out why our plumbers advise against using them below.

Already used Drano and the drain is still clogged?

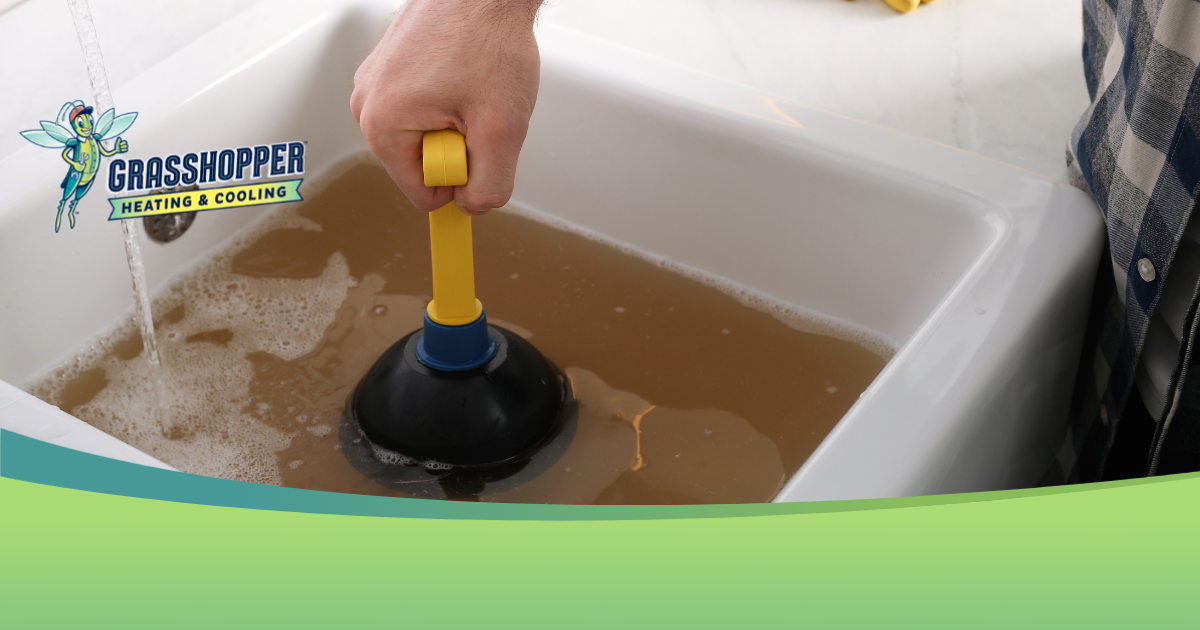
Don’t add more chemicals or switch to a different cleaner. Mixing products or plunging a drain with chemicals still in it can splash caustic liquid back at you. Our plumbers can safely clear the line with professional drain cleaning, clogged drain repair, or hydro jetting, and check your pipes for damage while we’re there. We serve Clifton Park, Albany, Saratoga Springs, and surrounding areas.

Call 518-545-3271Schedule a plumber online

Why Is Drano Bad for Pipes?

Drano is a brand of liquid drain cleaner that breaks down clogged material in household drains. It contains lye or sodium hydroxide which effectively dissolves organic matter trapped in a clogged sink. Other brands might add sulfuric acid to their formulas to quickly break down blockages.

However, the way it works can damage pipes, septic systems, and drains by:

  • Corroding PVC or plastic pipes by melting the materials.
  • Melting plastic components in your kitchen or bathroom sink.
  • Destroying the delicate ecosystem responsible for breaking down waste in your septic system.

If you use Drano or similar chemical cleaners to combat a clogged drain, consider other drain cleaners that have less harsh effects. After all, your preferred chemical solution might damage more than your plumbing system.

Other Reasons to Avoid Pouring Chemical Drain Cleaners Down Your Bathroom Sink

Chemical drain cleaners wreak havoc on the environment. When Drano exits your septic system or municipal sewage system, it infiltrates the local water supply. It can make its way into natural bodies of water or subterranean fresh water.

Its corrosive composition kills countless organisms, from helpful bacteria and fungi to aquatic plant and animal life. These disastrous consequences jeopardize local ecosystems, disrupting the delicate food chain that balances native flora and fauna populations.

Unclogging Drains While Protecting Your Plumbing System

What alternatives can you use if Drano is bad for pipes and wildlife? You might be surprised at the household products you have on hand to combat a clogged toilet or bathtub drain. Discover some easy, safe DIY methods to unclog and clean your drain pipes below.

Drain Snakes

You can purchase a drain snake from almost any retailer with household cleaning products. These long, pronged tools are your first line of defense against a blocked kitchen drain. Once you notice standing water collecting in a plumbing fixture, insert the drain snake into the drain opening.

Push it as deep as you can. The prongs will snag the offending material and pull it up when you remove the snake.

Boiling Water

This option is readily available and perfect for your kitchen sink. Sometimes, grease, fat, and other food particles harden against your drain pipe, forming a blockage. An oily or greasy clog dissolves after you pour hot water down the drain.

Dish Soap

Liquid dish soap gently lifts grime, grease, and organic matter from inside toilet bowls and sink drains. While many people only use it for hand-washing dishes, it also doubles as a multi-surface cleaner and safe yet persistent plumbing solution. Use it sparingly if you have a septic tank, as it may kill helpful bacteria populations.

Vinegar and Baking Soda

Remember the volcanic science project from grade school? This remedy applies that fun, nostalgic activity to household problems. First, pour boiling water into the blocked drain.

Then, shake one or two cups of baking soda into the fixture. Follow up with an equal amount of vinegar. Voila!

Baking soda and vinegar have additional benefits, such as:

  • Whitening and brightening your toilet bowl.
  • Deodorizing your garbage disposal.
  • Cleaning your dishwasher or washing machine.

Both ingredients are must-haves for your household maintenance duties.

Contact Grasshopper Heating, Cooling, Plumbing & Electrical for More Stubborn Clogged Drains

Is Drano bad for pipes? Unfortunately, this popular product isn’t just bad. It’s the worst.

Use our drain cleaning recommendations instead. If you encounter a clog you can’t defeat, call 518-545-3271 to schedule plumbing and drain cleaning services in Clifton Park, Albany, and the surrounding areas with Grasshopper Heating, Cooling, Plumbing & Electrical.

how do i stop my p-trap from leaking

How Do I Stop My P-Trap From Leaking?

A leaking P-trap can turn into a major plumbing disaster and cause a mess beneath your kitchen or bathroom sink. This begs the question: How do I stop my P-trap from leaking? Find out how the licensed plumbers at Grasshopper Heating, Cooling, Plumbing & Electrical address this issue and preserve plumbing systems.

Water leaking under your sink right now?

Stop using the sink and put a bucket under the trap. A slow drip can soak into the cabinet floor and subfloor before you notice any damage. If tightening the slip nuts doesn’t stop the leak, our licensed plumbers can repair or replace the trap and check the drain line behind it. We offer plumbing services in Clifton Park, Albany, Saratoga Springs, and surrounding areas.

Call 518-545-3271Schedule a plumber online

What Causes a Faulty P-Trap Pipe?

The main purpose of PVC or metal traps below sinks is to keep harmful gases out of the drain line. When PVC P-traps spring a leak, these gases can flow from the pipe and cause foul odors throughout your home. In addition, wastewater will seep out of pipe sections and cause significant damage.

Improper installation and ill-fitting compression nuts often lead to this issue. You may also experience a leak because of worn-out washers and pipe corrosion.

How to Fix the Plastic Trap Beneath Your Sink Drain

Ask a professional plumber, “How do I stop my P-trap from leaking?” and they’ll tell you that fixing the trap leak involves a few different steps. Below is a breakdown of tips for repairing the equipment.

Identify the Leak

Although you’ll likely suspect a leak because of the gas odors, you’ll have to pinpoint the exact location before moving forward. Look for any dripping water around the pipe.

Tighten the Compression Collar

It’s possible that the slip nuts on the P-trap became loose. You can try to hand tighten the collar or pick up some slip joint pliers from your local home improvement store. Be careful not to over-tighten the compression collar as this can damage the pipes.

Disassemble the Entire Trap

When tightening the collar fails to stop the leak, you’ll have to take a more robust approach to fixing your plumbing. Repairing your trap assembly involves:

  • Shutting off the water supply: Use the water shut-off valve to prevent a huge mess as you work on the pipe.
  • Removing the old P-trap: Loosen the nuts in the correct direction to remove the leaking part. Wipe up any water that spills out at this time.
  • Sealing the opening: Stuff a towel into the line to act as a pipe sealant and prevent sewer gas from escaping
  • Replacing damaged pieces: Head to your local hardware store and find replacement equipment for any damaged pieces, such as slip joint nuts, washers, and O-rings.

After you put the correct pieces in place it’s time to restore your water supply and turn on your bathroom or kitchen sink. The pipe should remove all wastewater without any leaks in sight. Contact an expert if you still find evidence of a leak and aren’t sure how to fix it.

Let Grasshopper Heating, Cooling, Plumbing & Electrical Repair Your Leaking Sink P-Trap

Why is my garbage disposal making strange noises? How do I stop my P-trap from leaking? The licensed plumbers at Grasshopper Heating & Cool can answer all of your plumbing questions.

Give us a call if you need someone to fix a leaky P-trap or tend to another plumbing issue. Call (518) 545-3271 to speak with a specialist.

The Root of the Problem: Why Your Sewer Line Keeps Clogging Every Spring

If your drains back up every spring like clockwork, it’s tempting to blame the same tired culprits: grease down the kitchen sink, one too many wipes flushed by accident. But for many Capital Region homeowners, especially those in neighborhoods with mature trees lining the yard, the real cause is underground and a lot harder to spot. Tree roots don’t take a season off, and spring is precisely when they cause the most trouble.

Why Spring Is Peak Season for Root Intrusion

As the ground thaws and trees come out of dormancy, root systems shift into active growth. Roots are relentless in their search for moisture, and a sewer line carrying warm, nutrient-rich wastewater is one of the most attractive water sources near any tree. Even the smallest crack, loose joint, or aging seal in a pipe gives roots an opening. Once inside, they don’t just pass through. They branch out, thicken, and create a web that catches paper, grease, and debris every time water flows past.

This is why the clog seems to reappear at the same point in the line year after year. Snaking a drain can punch a hole through the root mass and offer a few weeks of relief, but it rarely clears the roots growing along the pipe wall. Warmer soil temperatures each spring simply give those remaining roots the trigger to grow back through the same weak spot.

How to Tell Roots Are the Real Cause

A few patterns point specifically to roots rather than a simple clog. Slow drains throughout the house, not just in one fixture, suggest a blockage in the main line rather than an isolated pipe. Gurgling sounds from toilets or floor drains when you run the washing machine or dishwasher are another sign that something downstream is restricting flow. Recurring backups that clear temporarily after snaking, only to return within a season, are one of the clearest signals of ongoing root intrusion rather than a one-time obstruction.

Homes with clay or older cast iron sewer lines are especially prone to this pattern. Those materials were common in Capital Region homes built before the 1970s, and the joints between pipe sections are exactly where roots tend to find their way in.

Sewer Camera Inspection Confirms What’s Actually Happening

Guessing at the cause of a recurring clog usually leads to repeat service calls and repeat costs. A sewer camera inspection sends a waterproof camera through the line to show the exact location, size, and severity of root intrusion, along with any cracks or offset joints that are letting roots in. This step turns a repair from a guess into a plan, and it’s the difference between clearing a symptom and fixing the actual problem.

Hydro Jetting vs. Snaking for Root Removal

Snaking a drain works well for a simple, soft clog. But it is not effective against roots. A standard drain snake cuts a path through the blockage but leaves root material clinging to the pipe walls, which regrows quickly.

Hydrojetting uses high-pressure water, delivered through a specialized nozzle, to scour the entire interior of the pipe rather than just punching a hole through the middle of the clog. It strips roots, grease, and scale from the pipe wall and restores flow closer to the line’s original capacity. For a recurring root problem, hydro jetting typically buys homeowners significantly more time between service calls than snaking alone.

When Trenchless Sewer Repair Becomes Necessary

Hydro jetting clears roots, but it doesn’t fix a cracked or badly offset pipe that’s letting new roots in every season. When a camera inspection reveals structural damage, trenchless sewer repair involves lining the existing pipe from the inside without digging up the yard, driveway, or landscaping above it. It’s a more significant investment than jetting, but for a pipe that keeps failing at the same spot, it addresses the entry point rather than clearing it out again next spring.

If your drains have been backing up at the same time every year, it’s worth finding out whether roots are the reason before spring arrives again. Grasshopper Heating, Cooling, Plumbing & Electrical uses camera inspection to diagnose the cause first, then recommends hydro jetting or trenchless repair based on what the line actually needs. Contact us to schedule a sewer inspection for your Capital Region home.


FAQs About Clogged Sewer Lines

How can I prevent tree roots from clogging my sewer line?

Scheduling regular hydro jetting or a camera inspection every year or two helps catch root growth before it causes a full backup. Homeowners with mature trees near their sewer line can also ask about root-inhibiting treatments that slow regrowth between service visits.

Does homeowners insurance cover tree root damage to a sewer line?

Coverage varies widely by policy and by whether the damage is considered gradual wear or a sudden event, so it’s worth reviewing your specific policy or calling your insurer directly. Many standard homeowners policies exclude gradual root intrusion, though some offer optional sewer line endorsements that cover it.

How much does it typically cost to fix tree roots in a sewer line?

Cost depends heavily on the method needed and the extent of the damage, ranging from a straightforward hydro jetting service to a full trenchless repair for a cracked or severely compromised pipe. A camera inspection is the best way to get an accurate, line-specific estimate rather than guessing based on the clog alone.

Slow Drains? Here’s How To Tell If You Have a Partial Clog or a Bigger Sewer Issue

You turn on the kitchen faucet or step into the shower, and within seconds, water starts pooling around your feet. Slow drains are one of the most common plumbing frustrations homeowners face. While a slow drain might initially seem like a minor nuisance, it is often an early warning sign of a developing blockage deep within your plumbing system.

In Upstate New York homes—where hard water mineral scaling accumulates over time and mature tree roots in older Capital Region neighborhoods seek out moisture underground—understanding whether you are dealing with a localized fixture clog or a main sewer line blockage can save you thousands of dollars in water damage repairs. Below is a complete diagnostic guide from the licensed plumbers at Grasshopper Heating, Cooling, Plumbing & Electrical to help you determine what is happening inside your pipes.

Diagnostic Matrix: Partial Clog vs. Main Sewer Line Issue

Search engines and homeowners looking for quick diagnostic clues can use this comparison table to identify where their plumbing issue originates:

Warning Sign Localized Partial Clog Main Sewer Line Blockage Plumbing Vent Line Blockage
Affected Fixtures A single sink, shower, or bathtub Multiple fixtures across bathrooms & floors Multiple fixtures draining slowly; no backups
Fixture Cross-Talk None (issue is isolated) Running the washing machine causes toilet to gurgle or shower to back up Gurgling noises coming from walls or drains when flushing
Odors Present Localized musty or food odors from one drain Pervasive sewer gas smell in basement or yard Sewer odors near roof vents or indoor drains
Water Receding Speed Slowly empties over 5–15 minutes Water stops draining completely or backs up into lowest fixtures Slow drainage accompanied by heavy bubbling
Primary Cause Hair, soap scum, grease, mineral buildup Tree root intrusion, bellied pipes, main line debris Bird nests, leaves, or snow/ice capping roof vents

1. Signs You Have a Localized Partial Clog

A partial clog occurs when debris adheres to the inner walls of a single branch pipe, narrowing the passage for wastewater without shutting down flow completely.

Key indicators of a isolated partial clog include:

  • Single-Fixture Slowdown: Only one specific fixture (such as your master bathroom shower or kitchen sink) drains slowly, while all other sinks and toilets in your home function normally.
  • Hair & Soap Scum Accumulation: Bathroom drains frequently capture hair, conditioner, and body fats that form a sticky trap just past the P-trap.
  • Kitchen Grease & Mineral Scale: In kitchen sinks, cooking oils combine with calcium and magnesium from regional hard water to create heavy crusts inside supply and branch lines.

Recommended Action: Localized clogs can often be cleared using a manual hand auger (drain snake) or by removing and cleaning the sink P-trap. Avoid using caustic chemical drain cleaners, as harsh acids can corrode metal pipes, damage PVC seals, and fail to clear dense obstructions.

2. Signs You Have a Major Main Sewer Line Issue

Your main sewer line carries all wastewater from your home out to the municipal sewer system or septic tank. When a blockage forms in this primary artery, wastewater has nowhere to go and begins backing up into the lowest drains in your home.

Watch for these severe warning signs of a main sewer line breakdown:

  • Multiple Drains Backing Up Simultaneously: If using the kitchen sink causes water to rise in your main floor shower, or flushing the upstairs toilet causes the basement floor drain to bubble, your main line is blocked.
  • Gurgling & Water Recirculation: When water tries to push past a main line obstruction, trapped air forces its way back up through secondary fixtures, creating distinct gurgling or bubbling sounds.
  • Sewage Odors: A broken or completely clogged main sewer line often allows foul sewer gas (hydrogen sulfide) to leak into your basement, crawlspace, or yard.
  • Soggy Patches on Your Lawn: Underground tree root intrusion or collapsed clay sewer pipes can cause wastewater to pool under your grass, creating unusually green, wet patches in your yard.

3. Why Chemical Drain Cleaners Make Plumbing Problems Worse

When faced with a slow drain, many homeowners reach for store-bought liquid drain openers. However, chemical drain cleaners rely on powerful sodium hydroxide or sulfuric acid to dissolve clogs. These chemicals create intense exothermic heat inside your pipes that can:

  • Warp or melt thin PVC drain pipes
  • Corrode older cast-iron and copper plumbing joints
  • Become trapped behind a total blockage, creating a hazardous chemical splash risk for plumbers performing manual repairs

If natural DIY methods—such as flushing with hot water and baking soda—do not resolve the slow drain, professional mechanical clearing is the safest option for your plumbing infrastructure.

4. Professional Solutions for Clearing Stubborn Blockages

When basic plunging and snaking fail to restore proper flow, expert plumbers utilize advanced diagnostic equipment to locate and eliminate the obstruction without damaging your home:

HD Video Camera Line Inspection

A high-definition waterproof sewer camera is fed through your cleanout access point. This provides real-time video footage of the pipe interior, allowing plumbers to pinpoint exact blockages, locate tree root entry points, or spot cracked and sagging (“bellied”) pipe sections.

Commercial Hydro-Jetting Services

For heavy grease buildup, scale, or recurring line obstructions, hydro-jetting technology uses high-pressure water streams (up to 4,000 PSI) to scour the inner walls of your drain lines. Unlike a standard snake that merely punches a small hole through a clog, hydro-jetting completely cleans the pipe diameter, restoring original flow capacity and clearing away root intrusion.

Prevent Major Sewer Backups with Grasshopper Plumbing

Ignoring a slow drain often leads to messy sewage backups and expensive property restoration. At Grasshopper Heating, Cooling, Plumbing & Electrical, our licensed plumbers provide comprehensive drain cleaning services across Clifton Park, Saratoga Springs, Albany, and surrounding Capital Region communities.

Proudly woman-owned and operated since 2016, we maintain a BBB A+ rating, provide transparent flat-rate pricing, and deliver 24/7 emergency plumbing response when you need help most.

Is a slow drain causing trouble in your home? Contact Grasshopper online or call us today at (518) 241-1758 to schedule your drain inspection!

Where’s Your Main Water Shutoff Valve? Why You Should Know Before an Emergency

If a pipe suddenly bursts or a water heater starts leaking, every second counts. Yet many homeowners don’t know one of the most important details about their home’s plumbing system: where the main water shutoff valve is located.

At Grasshopper Heating, Cooling, Plumbing & Electrical, we’ve seen how quickly a minor plumbing issue can turn into major water damage simply because no one knew how to shut the water off. This guide is designed to help you feel confident, prepared, and ready—before an emergency happens.

What Is the Main Water Shutoff Valve?

Your main water shutoff valve controls the flow of water into your entire home. Turning it off stops water to all fixtures, appliances, and pipes at once.

Think of it as the emergency brake for your plumbing system. When something goes wrong, this valve is often the fastest way to prevent:

  • Flooded floors

  • Damaged walls and ceilings

  • Mold growth

  • Expensive repairs

Knowing where it is and how to use it can save thousands of dollars in damage.

Common Places to Find Your Main Water Shutoff Valve

While every home is a little different, most main water shutoff valves are located in one of these areas:

Inside the Home

  • Basement near the front foundation wall

  • Crawl space close to where the water line enters

  • Utility or mechanical room

  • Near the water heater (in some homes)

Outside the Home

  • Underground near the street or sidewalk

  • Inside a covered meter box

  • Near the foundation on older homes

If your home is older or has been remodeled, the location may not be obvious—which is why it’s important to locate it ahead of time.

Why Knowing This Valve Matters in an Emergency

Plumbing emergencies rarely happen at a convenient time. A burst pipe, overflowing toilet, or failed washing machine hose can release gallons of water in minutes.

If you know where the shutoff valve is:

  • You can stop the water immediately

  • You reduce damage while waiting for a plumber

  • You gain control in a stressful situation

If you don’t know where it is, you may be stuck watching water spread while trying to figure it out.

Situations Where You’ll Need to Shut Off the Water Fast

You should know how to shut off your water if:

  • A pipe bursts or cracks

  • A water heater is leaking

  • A toilet overflows and won’t stop

  • A washing machine or dishwasher hose breaks

  • You’re leaving your home for an extended period

In all of these cases, shutting off the main water supply is the safest first step.

How to Turn Off the Main Water Shutoff Valve

Most shutoff valves work one of two ways:

  • Gate or globe valve: Turn clockwise (right) until it stops

  • Ball valve: Turn the handle so it’s perpendicular to the pipe

Once the valve is off, open a faucet to confirm the water has stopped flowing.

If the valve is stuck, corroded, or difficult to turn, do not force it. That’s a sign it may need professional replacement.

What If You Can’t Find or Operate Your Shutoff Valve?

Many homeowners discover their shutoff valve is:

  • Hidden behind stored items

  • Rusted or seized

  • Outdated and unreliable

  • Completely unknown in location

This is more common than you might think, especially in older homes. A plumber can:

  • Locate the valve

  • Test that it works properly

  • Replace it with a modern, easy-to-use valve if needed

This small upgrade can make a huge difference during an emergency.

How Grasshopper Helps Homeowners Stay Prepared

At Grasshopper Heating, Cooling, Plumbing & Electrical, we believe preparation is just as important as repairs. During plumbing inspections or service visits, our team can:

  • Help you locate your main water shutoff valve

  • Ensure it’s in good working condition

  • Recommend upgrades for easier emergency access

  • Answer questions about your home’s plumbing layout

Our goal is to help you feel informed and confident—not caught off guard.

Don’t Wait for a Plumbing Emergency to Learn the Hard Way

Knowing where your main water shutoff valve is takes just a few minutes—but it can save you from major stress and damage later.

If you’re not sure where yours is, or if it hasn’t been checked in years, contact Grasshopper Heating, Cooling, Plumbing & Electrical today. We’ll help you prepare now, so you’re protected when it matters most.

Frozen Pipe Prevention in Upstate NY: What Actually Works?

Winters in Upstate New York are no joke. With long stretches of subfreezing temperatures, heavy snow, and brutal wind chills, your plumbing system faces constant stress. Frozen pipes are one of the most common and costly winter plumbing emergencies, often causing leaks, bursts, and extensive water damage.

At Grasshopper Heating, Cooling, Plumbing & Electric, we help homeowners stay ahead of the cold. If you’re wondering what actually works when it comes to frozen pipe prevention in Upstate NY, here are the proven strategies that protect homes year after year.

Why Pipes Freeze in the First Place

A pipe freezes when the water inside it drops below 32°F, causing it to expand. That expansion increases pressure along the line, often leading to a rupture. In Upstate NY, where temperatures can drop well below zero, certain pipes are especially vulnerable:

  • Pipes along exterior walls

  • Plumbing in unheated crawl spaces, attics, or basements

  • Outdoor spigots and hose bibs

  • Under-insulated or older home plumbing systems

Once pipes freeze, they can burst quickly and cause thousands of dollars in damage. Prevention is essential, especially before the coldest days arrive.

1. Proper Insulation: The Most Effective First Line of Defense

If you’re wondering what actually works, insulation is at the top of the list.

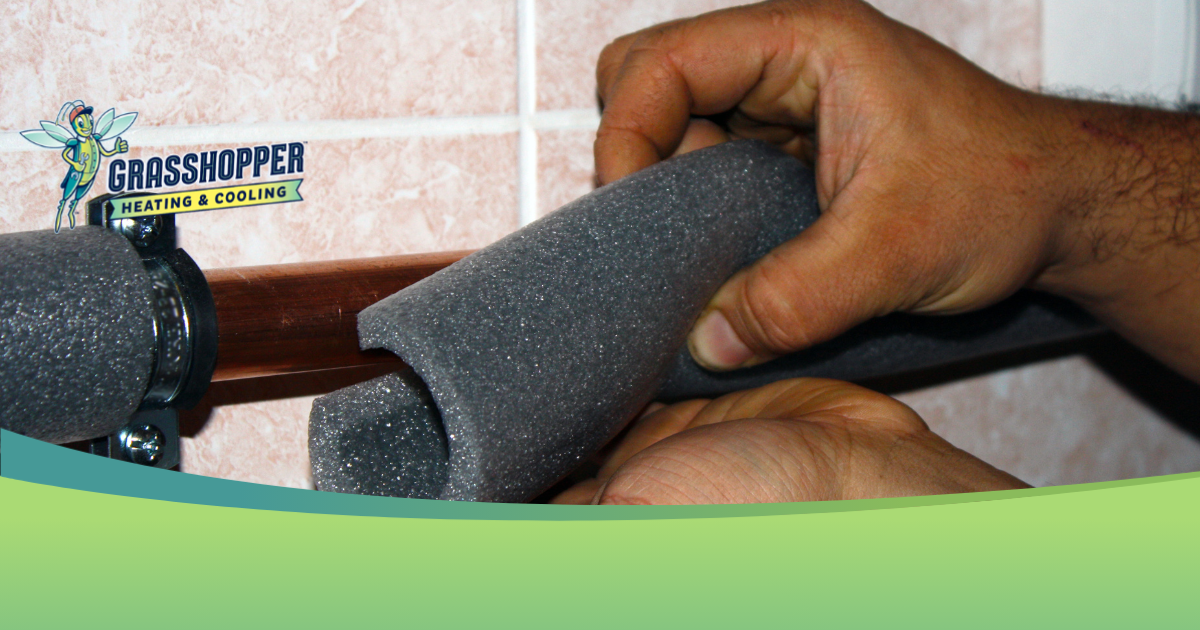
Use Foam Pipe Insulation

Affordable and highly effective, foam sleeves keep pipes warmer by reducing heat loss. These are especially helpful for:

  • Basement pipes

  • Garage plumbing

  • Crawl space lines

  • Utility room pipes

Add Heat Tape for High-Risk Pipes

Heat tape or heat cables provide direct warmth to pipes prone to freezing. When installed correctly, they keep vulnerable lines safely above freezing—ideal for older homes or exposed sections of pipe.

2. Keep Consistent Indoor Heating (Even When You’re Away)

A common misconception is that turning down the heat saves money. In reality, deep temperature drops inside your home put pipes at risk, especially overnight.

To prevent freezing:

  • Keep your thermostat at no lower than 55°F, even if you’re traveling.

  • Open interior doors to allow warm air to circulate.

  • Don’t block heating vents with furniture or storage.

A stable indoor temperature is one of the simplest and most reliable prevention methods.

3. Let Faucets Drip During Extreme Cold

When temperatures dip into the single digits or below, letting faucets drip from both the hot and cold sides can prevent pressure buildup—one of the leading causes of pipe bursts.

This works particularly well for:

  • Long pipe runs

  • Plumbing on exterior walls

  • Homes with older piping systems

A slow drip keeps water moving, making it far less likely to freeze.

4. Seal Air Leaks Around Your Home

Cold drafts are a major contributor to frozen pipes, especially in areas like:

  • Under sinks

  • Around foundation cracks

  • Near dryer vents

  • Around windows and doors

  • Behind kitchen or bathroom cabinets

Use caulk, foam insulation, or weatherstripping to seal gaps and stop frigid air from reaching vulnerable plumbing.

5. Disconnect and Winterize Outdoor Fixtures

Outdoor plumbing is always the first to freeze. Before the cold sets in:

  • Disconnect hoses

  • Drain outdoor faucets

  • Install insulated hose bib covers

  • Shut off the interior supply line to exterior spigots (if your home has one)

These small steps greatly reduce the risk of ice forming inside the line and spreading into your home.

6. Insulate or Heat Your Basement, Crawl Space, or Attic

Unheated spaces allow temperatures to drop fast. Adding insulation—or, in some cases, installing a small heating solution—can make a big difference.

Options include:

  • Rigid foam board insulation

  • Spray foam insulation

  • Adding vents or fans to improve warm-air circulation

  • Installing a low-wattage space heater (in safe, supervised areas only)

Even raising the temperature by a few degrees can help prevent freezing.

7. Know When to Call a Professional

If a pipe has already frozen, or you notice frost buildup, reduced water flow, or strange noises in your plumbing, it’s time to call a professional right away.

At Grasshopper Heating, Cooling, Plumbing & Electric, we offer:

  • Emergency frozen pipe repair

  • Pipe thawing services

  • Insulation and winterization upgrades

  • Plumbing inspections for cold-weather readiness

It’s always better to address issues early before they turn into expensive repairs.

Protect Your Upstate NY Home This Winter

Frozen pipe prevention isn’t a luxury; it’s a necessity in Upstate NY. With the right combination of insulation, heating, and proactive maintenance, you can safeguard your plumbing system and avoid costly damage.

If you want expert help winterizing your home, preparing vulnerable pipes, or inspecting your plumbing before the temperatures drop, the team at Grasshopper Heating, Cooling, Plumbing & Electric is here for you.

Contact us today to schedule your winter plumbing checkup and keep your home protected all season long.

Why Your Water Smells Weird—And What Your Plumbing Might Be Telling You

Have you ever turned on the tap and noticed a funny smell in your water? Whether it’s a sulfur-like “rotten egg” scent, a metallic odor, or something just plain off, unusual water smells are more than just unpleasant—they can signal underlying issues with your plumbing or water supply.

At Grasshopper Heating, Cooling, Plumbing & Electrical, we often get calls from homeowners concerned about water odor. Understanding what different smells mean can help you take action before small problems turn into costly repairs.

1. Common Water Smells and What They Mean

Different odors often point to specific plumbing or water quality issues:

Sulfur or “Rotten Egg” Smell

  • Usually caused by hydrogen sulfide gas in your water heater or plumbing system.

  • Can result from bacterial growth in the water heater tank or natural minerals in well water.

  • While small amounts are typically harmless, persistent odors may indicate corrosion in the tank or bacterial contamination that requires professional attention.

Metallic or “Iron” Smell

  • Often a rusty or metallic scent in the water.

  • Usually comes from corroded pipes, especially in older homes with iron or galvanized plumbing.

  • High iron content in well water can also cause a metallic taste and reddish stains on sinks and laundry.

Chlorine or Bleach-Like Smell

  • Typically comes from municipal water treatment, where chlorine is added to kill bacteria.

  • A strong chlorine odor could indicate that water is sitting too long in the pipes or that your home needs a filter or aeration system to remove excess chlorine.

Musty or Earthy Smell

  • Often a sign of algae or bacterial growth in wells, storage tanks, or plumbing.

  • Can sometimes result from stagnant water in pipes that aren’t used frequently.

2. What Your Plumbing Might Be Telling You

Water odors don’t appear out of nowhere—they usually signal a plumbing system issue. Common causes include:

  • Old or corroded pipes: Metallic smells or rust-colored water can indicate aging plumbing that may need inspection or replacement.

  • Water heater problems: A sulfur-like smell often comes from the water heater anode rod reacting with bacteria or minerals in the tank.

  • Well water contamination: If you rely on a private well, certain smells may indicate natural mineral content or bacterial growth. Testing and treatment may be required.

  • Stagnant water: Pipes that aren’t used regularly can develop odors and taste issues over time.

Ignoring these signs can lead to bigger problems, such as pipe damage, plumbing leaks, or even health risks if bacteria are present.

3. Steps You Can Take at Home

While some water smells require professional attention, there are steps you can take to minimize odor:

  • Flush the system: Run taps for several minutes to clear out stagnant water.

  • Clean your aerators: Remove and clean faucet screens where bacteria or sediment can accumulate.

  • Check your water heater: If it’s old or producing a sulfur smell, consider flushing the tank or replacing the anode rod.

  • Install a filtration system: Activated carbon filters can reduce chlorine, metallic, or musty odors.

These measures can improve taste and smell temporarily, but if the odor persists, it’s time to call a professional.

4. When to Call a Plumbing Professional

Persistent or strong odors should never be ignored. Call Grasshopper Heating, Cooling, Plumbing & Electrical if you notice:

  • Sulfur or rotten egg smells coming from multiple faucets

  • Rust-colored or metallic water

  • Musty or earthy odors in your well water

  • Sudden changes in water smell or taste

Our licensed technicians can test your water, inspect your plumbing system, and recommend the right solutions, whether it’s water treatment, pipe replacement, or water heater maintenance.

5. Final Word: Don’t Ignore Unusual Water Smells

Water is essential for daily life, and unusual odors are a warning sign that something might be wrong with your plumbing system. Early action can prevent bigger problems, protect your health, and save you money on costly repairs.

At Grasshopper Heating, Cooling, Plumbing & Electrical, we provide expert plumbing inspections, water testing, and maintenance solutions to keep your home’s water clean, safe, and odor-free.

Contact us today at gograsshopper.com to schedule a professional inspection and ensure your water is healthy and safe.

Should You Invest in a Whole-House Water Filtration System?

Water flows from every tap in your home, but do you really know what’s in it? For families in Clifton Park, NY, and throughout the region, tap water can contain everything from chlorine and sediment to minerals that leave stains and buildup throughout your home.

A whole-house water filtration system promises clean, safe water from every faucet, shower, and appliance. But with installation costs and various system options to consider, many homeowners wonder if it’s truly worth the investment.

This guide will help you weigh the benefits, costs, and signs that indicate your home could benefit from whole-house water filtration.

What Is a Whole-House Water Filtration System?

A whole-house water filtration system is installed at your main water line, ensuring every drop of water entering your home gets filtered before reaching your faucets, showers, and appliances. Unlike point-of-use filters that treat water at individual taps, this comprehensive approach addresses water quality throughout your entire home.

Several types of filtration systems are available:

Carbon filters excel at removing chlorine, improving taste, and eliminating odors that make water unpleasant to drink or smell.

Sediment filters catch particles like sand, dirt, and rust before they can damage your plumbing or stain your fixtures.

UV filters use ultraviolet light to neutralize bacteria, viruses, and other microorganisms without adding chemicals.

Reverse osmosis systems target specific contaminants based on your water quality needs, providing the most thorough filtration option.

Signs You Might Need One

Several red flags indicate your home could benefit from whole-house water filtration:

Strange tastes or odors coming from your tap water signal the presence of chlorine, sulfur, or other contaminants. If your water tastes metallic, smells like rotten eggs, or has a chemical aftertaste, filtration can help.

Dry skin or dull hair after showering often results from hard water or chlorine exposure. Many residents notice softer skin and shinier hair after installing filtration systems.

Staining on sinks, tubs, or laundry typically comes from iron, manganese, or other minerals in your water supply. These same minerals can cause white or colored clothing to look dingy over time.

Scale buildup in appliances and fixtures shortens their lifespan and reduces efficiency. If you notice white, chalky deposits on your faucets or inside your coffee maker, the mineral content may be too high.

Well water users and residents in areas with known water quality issues should strongly consider whole-house filtration as a precautionary measure.

Benefits of a Whole-House Water Filtration System

Healthier Water for Drinking, Cooking & Bathing

Filtration systems remove harmful contaminants like lead, chlorine, volatile organic compounds (VOCs), and microorganisms that could affect your family’s health. You’ll have confidence that every glass of water and every meal prepared with your tap water is as clean as possible.

Protects Plumbing and Appliances

Filtered water reduces scale buildup and mineral deposits that can damage water heaters, washing machines, dishwashers, and pipes. This protection helps your appliances run more efficiently and extends their operational life.

Better Skin, Hair & Laundry

Softer, cleaner water feels gentler on your skin and hair. Clothes washed in filtered water stay brighter and feel softer because harsh minerals and chemicals aren’t dulling fabrics or irritating sensitive skin.

Environmental & Cost Savings

Whole-house filtration reduces your family’s dependence on bottled water, cutting plastic waste and grocery costs. Additionally, appliances that run more efficiently thanks to cleaner water can lower your energy bills over time.

What Does Installation Involve?

Professional installation typically takes place where water enters your home, before it reaches your water heater. A licensed technician will assess your current plumbing setup and water quality to recommend the most appropriate system for your needs.

The installation process involves connecting the filtration system to your main water line and may require some plumbing modifications. Most installations can be completed in a few hours, though complex systems or unique home layouts may take longer.

At Grasshopper Heating Cooling & Plumbing, we start with a thorough water quality assessment to identify specific contaminants and recommend the right filtration approach for your Clifton Park home.

Is It Worth the Investment?

The upfront cost of a whole-house water filtration system varies depending on your water quality needs and the type of system you choose. However, many homeowners find the investment pays for itself through several long-term benefits.

Reduced bottled water purchases can save hundreds of dollars annually for families who regularly buy drinking water. Extended appliance life means fewer replacements and repair costs over time.

Beyond financial considerations, the peace of mind that comes with knowing your family has access to clean, safe water from every tap adds significant value. Many homeowners also find that water quality improvements increase their home’s overall value.

Why Choose Grasshopper Heating Cooling & Plumbing

As trusted experts in home comfort and water quality throughout Schenectady and the Capital Region, Grasshopper Heating Cooling & Plumbing provides honest assessments, professional installations, and dependable ongoing support.

Our team understands the unique water quality challenges facing homeowners in Clifton Park and surrounding areas. We serve as your one-stop shop for plumbing, HVAC, and electrical needs, ensuring all your home systems work together seamlessly.

Take the Next Step Toward Cleaner Water

Ready to discover what’s really in your water and explore your filtration options? Grasshopper Heating Cooling & Plumbing offers free in-home water quality assessments to help you make an informed decision about whole-house filtration.

Contact us today to schedule your assessment and learn how clean, filtered water can improve your family’s health, protect your home’s plumbing, and provide lasting peace of mind.

How To Protect Your Pipes in Freezing Weather

When temperatures drop, your pipes are at risk of freezing, which can lead to costly water damage and major repairs. Taking the right precautions before winter sets in can help you avoid frozen or burst pipes and the headaches that come with them.

At Grasshopper Heating, Cooling, Plumbing & Electrical, we want to help you keep your home safe from winter damage.

Insulate Your Pipes for Freeze Protection

One of the best ways to prevent frozen pipes is by adding insulation. When pipes are exposed to cold air, the water inside them can freeze and expand, increasing the risk of bursting. Insulating pipes in unheated areas, such as basements, attics, and crawl spaces, helps retain heat and prevent freezing.

Here are some effective insulation materials:

  • Foam pipe wraps: These are easy to install and great for keeping pipes warm.
  • Fiberglass insulation: This insulation works best for large pipes and extremely cold conditions.
  • Heating tape: Convenient tape provides direct heat to pipes that are most at risk.

In addition to freeze protection, insulating your pipes improves energy efficiency by reducing heat loss.

Use Pipe Wraps To Prevent Freezing

Pipe wraps add an extra layer of insulation, helping to maintain warmth even in subzero conditions. They are especially useful for exposed pipes or those in unheated spaces.

Common types of pipe wraps include:

  • Self-sealing foam wraps: They’re simple to apply and ideal for both indoor and outdoor pipes.
  • Reflective insulation wraps: These wraps reflect heat back into the pipes.
  • Rubber-based insulation: This insulation is flexible, moisture-resistant, and perfect for outdoor use.

Protect Outdoor Faucets From Freezing

Outdoor faucets are especially vulnerable to freezing since they are directly exposed to the elements. If water inside an outdoor faucet freezes, it can cause the connected pipe to burst.

To protect your outdoor faucets:

  • Disconnect and drain garden hoses before winter.
  • Install insulated faucet covers to shield them from the cold.
  • Shut off the outdoor water supply and drain any remaining water.

Use Drip Prevention To Avoid Frozen Pipes

Letting your faucets drip slightly during freezing weather can keep your pipes from freezing. Moving water is less likely to freeze than stagnant water, reducing the risk of blockages and bursts.

Here’s how to use drip prevention effectively:

  • Let faucets drip overnight when temperatures are at their lowest.
  • Focus on pipes along exterior walls, as they are most vulnerable.
  • Use both hot and cold water taps to keep the entire system moving.

Grasshopper Heating, Cooling, Plumbing & Electrical Keeps Your Pipes Safe

Now that you know how to protect your pipes in freezing weather, you can take action to prevent damage before winter arrives. Insulation, pipe wraps, and drip prevention all play a key role in keeping your plumbing safe.

Grasshopper Heating, Cooling, Plumbing & Electrical provides expert advice and solutions to protect your home’s plumbing throughout the winter. Our team specializes in heating, cooling, and home comfort services tailored to your needs.

If you need help protecting your pipes in freezing weather, call us at 518-545-3271.