Rated: 4.9 / 5 based on 2,600+ reviews. Read our reviews

Available 24/7! Call now to schedule! (518) 545-3271

Author: Amanda Triolo

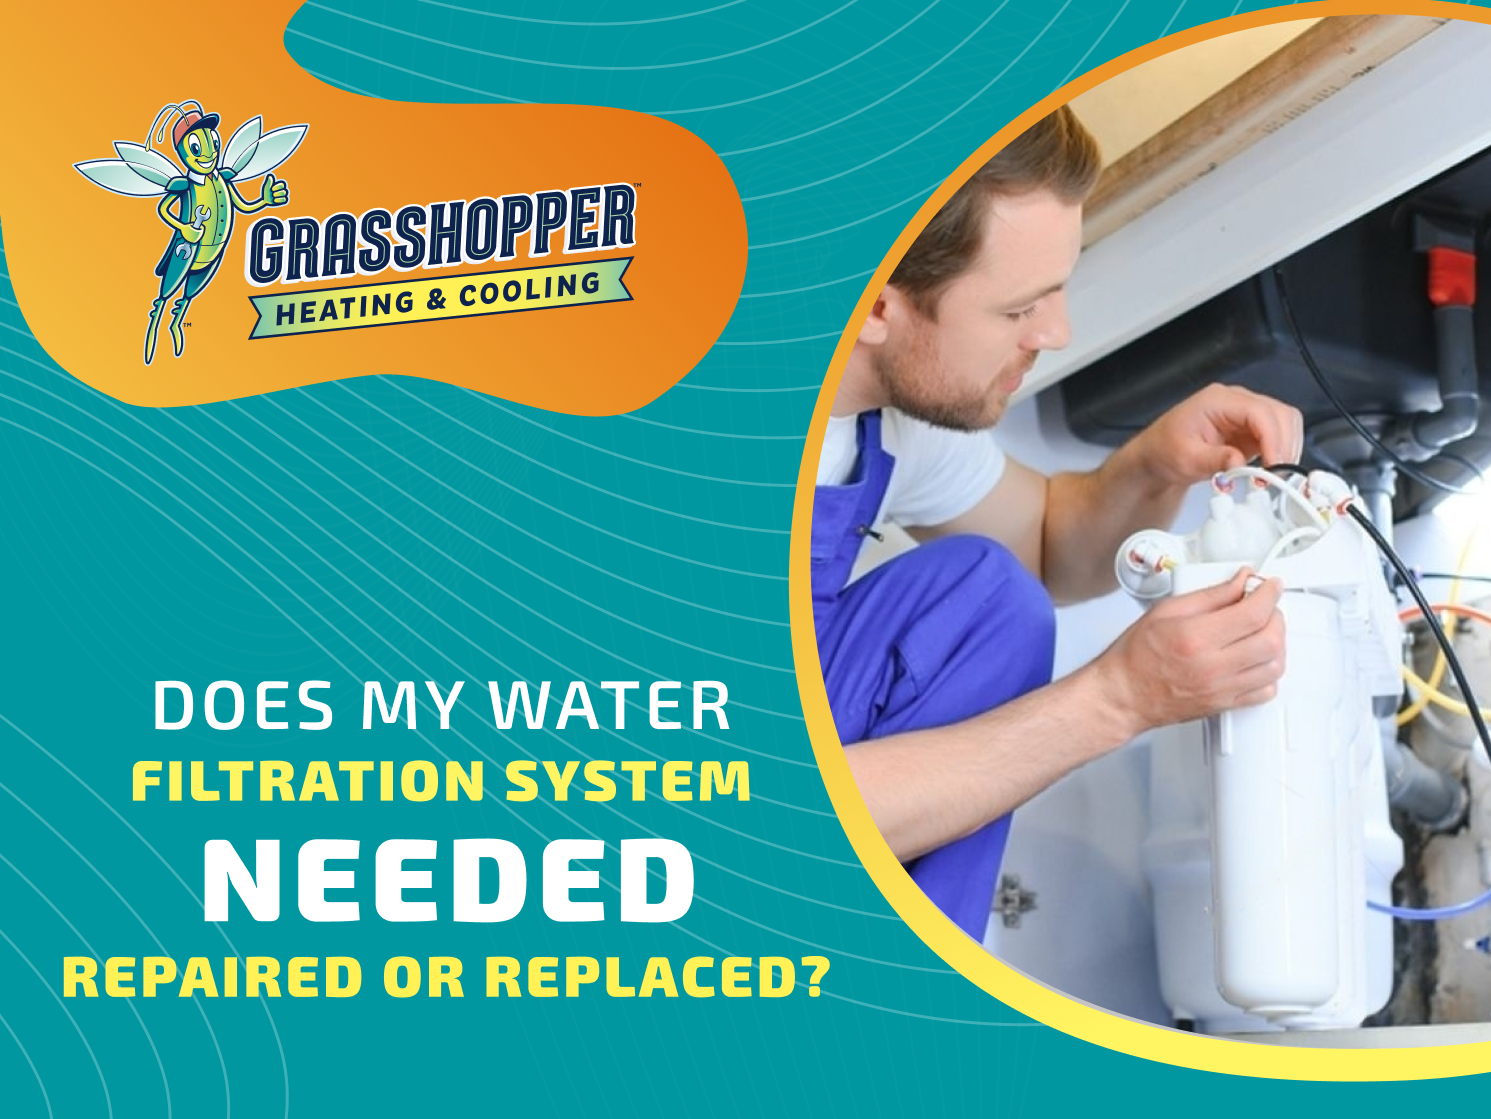
Does My Water Filtration System Need to Be Repaired or Replaced?

Does My Water Filtration System Need to Be Repaired or Replaced?

Knowing when to replace your home water filtration system will ensure you continue to benefit from good water quality. Whole house systems are complex. Although they can be repaired, there are signs your system is no longer functional and must be replaced to ensure sediment, minerals, rust, chemicals, odors, and microbes are removed from your water supply. Here are signs you should call us for whole home water filtration installation.

Dirty Water

If you have a whole-home water filter and tap water appears discolored or has pieces of dirt, debris, mineral scale, or rust particles, your filtration system isn’t doing its job. Consult with a plumber to determine the next steps. They’ll tell you if the whole system must be replaced. Other options include replacing the pre-sediment filter, which should be done every 3 to 6 months. Sub-micron-post filters (in systems that have them) can last up to 12 months.

Unpleasant Odors

If the water smells like rotten eggs or chlorine, assume it’s unsuitable for drinking. Your water filtration system isn’t removing the compounds it is supposed to. A professional will determine if part or all of the system has gone bad. An unpleasant smell can be due to a relatively minor issue like a clogged filter or a major fault in the system.

Poor Tasting Water

If your water doesn’t taste right, there’s likely a significant filtration problem. The difference in taste may be subtle at first. But any change in taste can mean the filtration system is contaminated with bacteria or isn’t working at all. Call a technician if the water starts to taste bitter, tart, metallic, or otherwise unpleasant, and replacing the filter doesn’t resolve the issue. 

Unusual Sounds

When you turn on the faucet and hear what sounds like a labored water pump, the filtration system may be breaking down. The sound may occur intermittently or be persistent. If the system is several years old, it likely needs to be replaced.

Low Water Pressure

A drop in water pressure can be due to a clogged filter. If so, then replacing the filter should restore normal pressure. But if a new filter doesn’t resolve the issue, the filtration system or your plumbing may be leaking. Call a professional to assess the problem and determine if you need a new water filtration system or a plumbing repair.

Water Has a Slippery Feel

If too much sodium is added to your water, it will feel slippery. Soft water has a high sodium and potassium ion content. Call a technician if the water doesn’t feel right on your skin. An improper balance of sodium ions, which are used to exchange calcium and magnesium ions in hard water, can mean your filtration system is near the end of its life.

What Affects My Water Filtration System’s Lifespan?

The water quality in your area can affect the life of your system. For example, the more contaminated the water supply, the harder the filtration system must work. Daily water consumption is another factor, especially with the lifespan of a whole house water filter tank. A tank rated for 300,000 gallons of water lasts about three years; a 1,000,000-gallon-rated tank should be replaced every 10 years. 

The type of filtration system is also a factor. Check with the manufacturer as to when to expect to replace your water filtration system. Maintenance is a consideration as well; if you haven’t kept up with routine care, such as replacing filters, your filtration system won’t last as long.

Contact Grasshopper Heating, Cooling, Plumbing & Electrical

Our water filtration specialists can check your system and determine whether it should be repaired or replaced. We install and service the industry’s leading whole-home water filtration systems, including Halo products. To request service, learn more about our products and financing options, or receive a free estimate, call (518) 216-0051.
6 Dangers of DIY Heating Repair

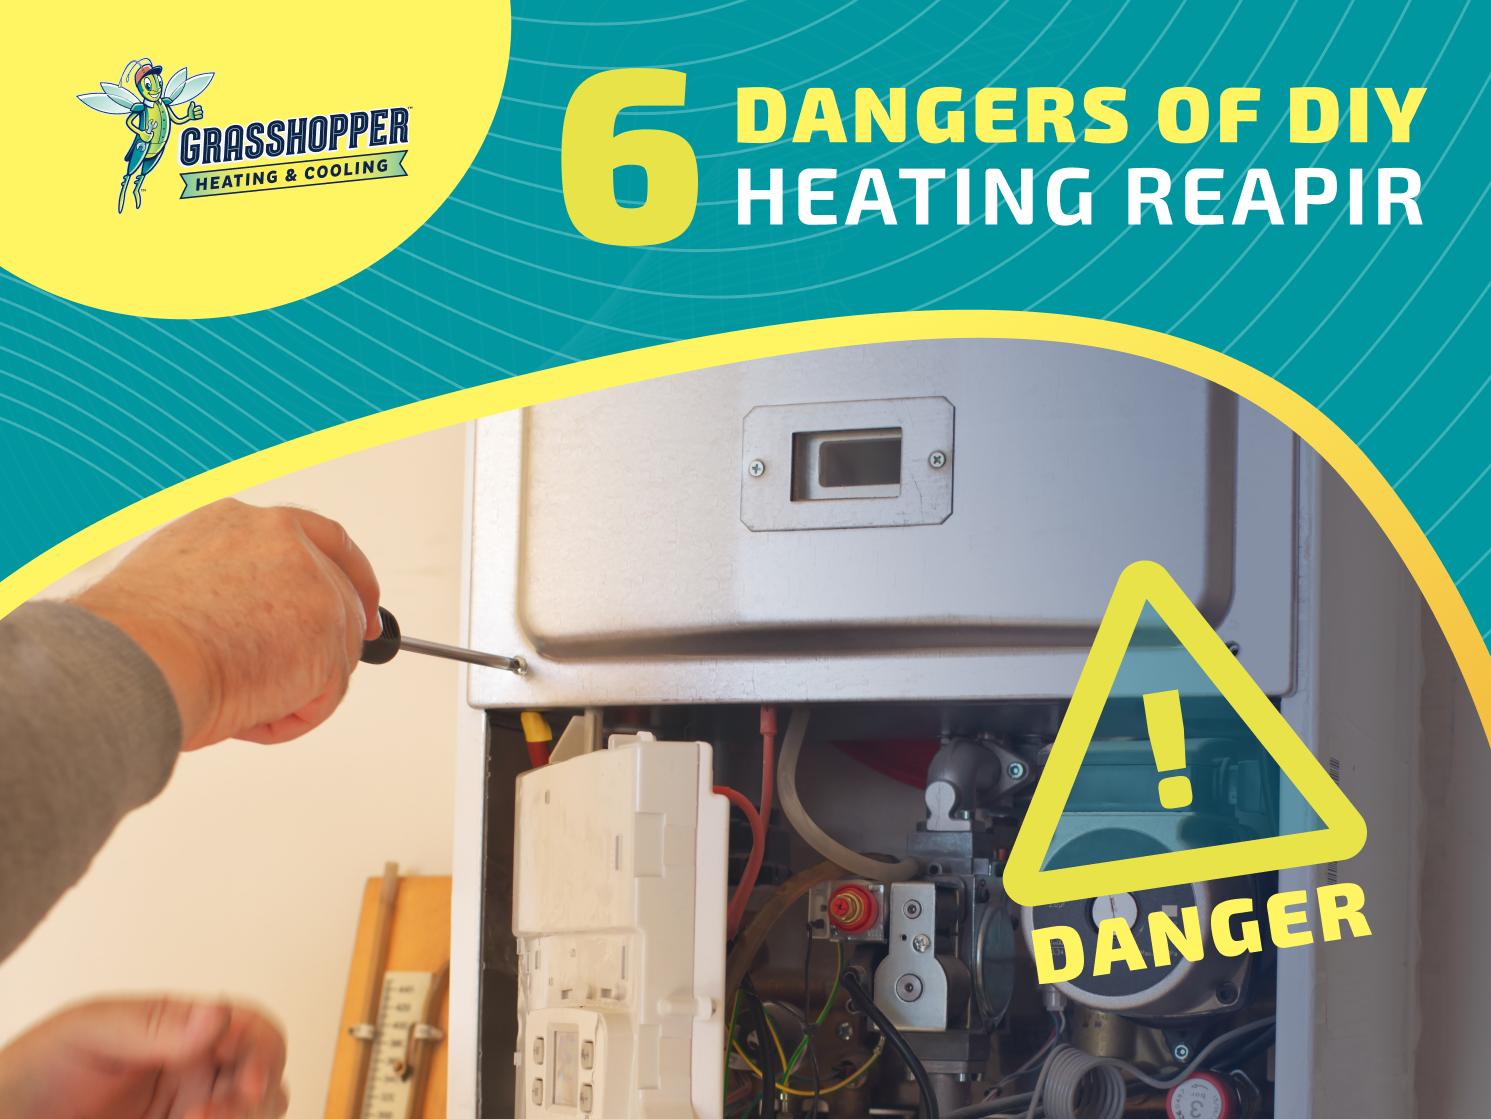
6 Dangers of DIY Heating Repair

A DIY heating repair can put you in a lot of danger. Most homeowners don’t have the knowledge, tools, or equipment to pull off a furnace repair. Here are six hazards and risks you’ll face unless you hire a licensed and experienced HVAC professional.

1. Exposure to Carbon Monoxide

A byproduct of burning fuels, carbon monoxide is odorless, colorless, and toxic. It is normally contained and ventilated out of your home. But if your furnace is damaged, carbon monoxide can leak and cause a range of symptoms. In high concentrations, it can lead to unconsciousness and death. Check your carbon monoxide detector’s batteries regularly to ensure it’s working, and always call a heating repair technician just to be safe. 

2. Fire or Explosion

A damaged burner, heating element, pilot light, ignitor, or gas connection can trigger a fire. Faulty wiring is another risk. Don’t work on these parts and components if you don’t have experience. If there’s a gas leak, an explosion can have devastating and deadly consequences. Hiring a professional can save your life and your home.

3. Shock or Electrocution

Heating systems have various electrical connections. Touching a damaged wire or the wrong electrical component, or mishandling a loose connector, can result in a strong shock. You can also be electrocuted. 

Furnace repair work often requires turning off the power to the circuit first. That’s the only way to avoid exposure to electric current in the first place. But even if you turn off the breaker, a faulty component can carry an electric charge that can injure or kill you. Heating techs use protective equipment to avoid this.

4. Furnace Damage

If you haven’t received training or passed a certification test, you likely can’t correctly troubleshoot and diagnose a furnace problem. You may look in the wrong place to try to fix a minor issue. A DIY repair can result in damage to other components or worsen the problem you’re attempting to fix. 

Botching a DIY heating repair is often costly. The repairs you’ll need afterward can be much more expensive than having hired a professional in the first place.

5. Voiding the Warranty

An HVAC warranty typically requires repairs to be done by a certified professional. If you perform a DIY repair and damage the unit, the warranty will be voided and the manufacturer will not cover the repair cost. The cost of furnace repair, which includes parts, fees, and labor, can be quite expensive. Voiding the warranty is a risk best not taken.

6. Time-Consuming Repairs

A licensed professional usually completes a heating repair quickly. They have the experience and tools to do so. Plus, they’re on a tight schedule. But that doesn’t stop them from being thorough and effective.

It would take you much longer to troubleshoot the issue, gather the right tools, and disassemble and repair the unit. But a professional knows the proper solution and steps to complete the job in a short time.

Are There Any DIY Solutions to Heating Issues?

A heating repair must be left to a professional unless you can address an issue with any of these simple solutions:

  • Adjust the thermostat
  • Replace the thermostat battery
  • Clean or replace the filter
  • Reset the circuit breaker
  • Secure the cabinet panel
  • Clean out the drain line
  • Remove leaves and debris from intake/exhaust vents
  • Open or unblock HVAC vents

Contact Grasshopper Heating, Cooling, Plumbing & Electrical

Our skilled technicians provide any heating repair. A furnace problem can originate from a faulty internal part or component or the unit’s gas or power supply. When you call, we’ll send a professional to quickly get your heating system back up and running. We’re available 24/7 for emergency repairs. Call if your system blows cold air, delivers uneven temperatures, makes strange noises, or smells like it’s burning. For immediate furnace repair, call (518) 216-0051 now.

How to Ensure Central AC Installation Goes Smoothly

How to Ensure Central AC Installation Goes Smoothly

Central AC installation can be stressful, especially if it’s not planned well and you make mistakes. Properly investing your time and money can result in a smoother installation process plus improved energy efficiency, fewer repairs, and a longer-lasting AC. It can save you from the start and throughout the life of your system.

Achieving these results may be easier. Here are effective ways to ensure a smooth and successful AC installation in your Albany-area home:

Make Sure the AC System Isn’t Too Big or Too Small

Sizing a central air conditioner is a crucial step. The square footage of your home is just one factor in determining the best-sized system. For accurate results, a professional will perform a Manual J load calculation that uses room size, ceiling height, the number of windows, and the number of occupants (plus other variables) to help select an AC unit. 

An undersized AC may run constantly and not cool your home. If a unit is oversized, it may not run long enough, leading to higher humidity, increased energy consumption (by turning on and off more frequently), and strain that can shorten the system’s life. The right-sized system will run efficiently, require fewer repairs, and maintain indoor comfort.

Choose the Ideal Location for AC Equipment

An HVAC contractor should inspect your home to determine where to place the outdoor and indoor units. The outdoor unit, which contains the compressor and condenser coil, should be placed:

  • Out of Direct Sunlight: It can heat refrigerant, force the unit to work harder, and increase wear and tear.
  • Away from Trees or Bushes: Leaves, bark, twigs, and other debris can get trapped in the unit and damage the blower fan and motor.
  • Away from a Bedroom Wall: Condenser units can be noisy, so place them away from any wall shared with a bedroom or other frequently used area.
  • In a Protected Spot: Consider surrounding the outdoor unit with a fence or other barrier to protect it from debris, animals, or children. Also, maintain a few feet of clearance around it.

Your options for placing the indoor unit, which includes the main blower fan and evaporator coil, may be limited. Many homeowners choose to install it in the basement or a closet. Also, consider placing the indoor unit:

  • Away from Sleeping Areas: The blower fan will make some noise, so it can distract light sleepers. It should be placed far enough from any bedrooms if possible.
  • Not Near Electronic Equipment: Air conditioners are designed to drain excess moisture, but if there’s a clog, water can drip onto the floor or nearby equipment and cause damage.
  • In a Cooler Area: If the unit is in a hotter location, servicing it will be more complex and time-consuming, increasing a technician’s billable hours (you’ll pay more for labor).

Where you install the thermostat is also important. Make sure it’s not in direct sunlight, in an area prone to temperature extremes, or directly below a vent.

Prepare Your Home for Installation

When the HVAC installers arrive, they will need space to work. Know in advance where equipment will be installed outdoors and inside your home. Technicians will also have to lay out tools and parts. Trim back foliage outside if necessary. Indoors, move any furniture, artwork, and antiques that may limit workers’ space or movement. This will help the installation go smoothly and efficiently and reduce the risk of accidents and property damage.

Schedule a Ductwork Inspection

Duct replacement is often a part of AC installation and is recommended by many HVAC contractors. If ductwork is damaged, blocked, or deteriorated, it can impede the distribution of conditioned air throughout your home. By inspecting ductwork, a technician can determine if it needs repair or replacement. If so, it’ll extend the length and cost of the project but enable the new system to run more efficiently.

Arrange for Safe Accommodation for Children and Pets

On installation day, heavy equipment and tools will be in your home. The process will go more smoothly and safely if children and pets are out of the way. Find a secure area in your home or make arrangements with a family member, friend, or neighbor. Also, inform any tenants of the installation schedule so they can make the proper arrangements. 

Adjust Your Schedule Accordingly

As the owner of the property and/or a decision maker, you should be present when the AC installation team arrives. They’ll do an initial walk-through of the job site and may have questions for you at any point. Being there to provide answers can help things go more smoothly. You should also ask any questions that haven’t yet been answered.

You may also need to be present for:

  • Equipment testing
  • City inspections
  • Progress payments, as outlined in the contract
  • An overview of operating the system
  • A review of warranty information
  • An explanation of maintenance and service requirements

Hire a Professional AC Installer

Homeowners with a knack for DIY projects may consider installing a central AC system themselves. However, central AC installation should be left to a knowledgeable, experienced, and licensed professional. They know how to avoid costly mistakes and have the tools and equipment to install complex components, ensuring the job is done safely and correctly.

Contact Grasshopper Heating, Cooling, Plumbing & Electrical for Central AC Installation

Based in Clifton Park, NY, Grasshopper Heating, Cooling, Plumbing & Electrical ensures AC installation goes smoothly by determining your cooling needs, sizing the system, and following all safety protocols and local regulations. We are EPA-certified and have an A+ rating with the Better Business Bureau. We offer specials and financing opportunities to help you afford a newer, more efficient air conditioning system. To learn more or schedule a free estimate on AC installation and replacement, call (518) 240-9467 today.


8 Ways to Improve Indoor Air Quality in Clifton Park, NY

8 Ways to Improve Indoor Air Quality in Clifton Park, NY


Indoor air pollution isn’t a common topic of discussion. Nonetheless, the air in your home may contain high concentrations of biological pollutants and chemicals from cleaning products. Other contaminants include tobacco smoke, carbon monoxide, and volatile organic compounds (VOCs) from paints, varnishes, pressed wood, dry-cleaned clothing, and other sources. You may not realize it, but indoor air quality in your Clifton Park, NY, home may affect your family’s comfort, health, and well-being.

Fortunately, there are several ways to improve indoor air quality (IAQ). We’ll explain a few steps to take if you frequently experience sinus or respiratory symptoms, allergies, headaches, fatigue, or other signs of exposure to IAQ pollutants or if an air quality test finds a problem. Here are eight ways you can improve your home’s indoor air quality:

1. Change Your HVAC Filter

Check your air filter once a month and change it every three months or sooner if necessary. An HVAC filter captures dust and debris. If it gets clogged, particulates and allergens can be blown into the air. A dirty filter also reduces an HVAC system’s efficiency and can cause it to overheat.

2. Keep Your Home Clean

Dust and vacuum your home regularly. Use a vacuum cleaner with HEPA filtration; this captures fine particles and prevents dust and dirt from blowing back into the air. Make sure to clean floors, rugs, carpets, furniture, blinds, curtains, countertops, and all other surfaces. Good cleaning habits can improve indoor air quality in a Clifton Park home.

3. Avoid Chemical-Based Cleaning Products

Many consumer cleaning agents and air fresheners contain VOCs and harmful chemicals. Both aerosols and liquids can have ingredients such as sulfates, chlorine, trichloroethylene, and sodium hydroxide, among many others. Avoid such products and bleach-based solutions. Hypoallergenic and even homemade cleaners can be just as effective.

4. Improve Ventilation

Letting outdoor air in can reduce the concentration of indoor pollutants. Your HVAC system may not bring in fresh air. However, you can open windows and doors to let fresh, clean air into your home. If you have a window air conditioner, open the vent control to do so. Running a kitchen or bathroom fan exhausts contaminants from the room and increases ventilation.

5. Increase Ventilation When Engaging in Pollution-Generating Activities

Ventilate your home whenever you cook, paint, wax a floor, or use a kerosene heater, fireplace, or wood-burning stove. Welding, sanding, soldering, and other activities associated with hobbies and maintenance can also contribute to IAQ issues. So, properly ventilate the room when performing these tasks.

6. Take Your Shoes Off at the Front Door

The soles of your shoes collect dirt, germs, and various contaminants you don’t want in your home. Anything on the ground can stick to shoes and be tracked inside. Take your shoes off before entering your home to avoid polluting surfaces and the air and, in some cases, prevent allergy symptoms or illnesses.

7. Buy Houseplants

Houseplants look great and create a more soothing environment. They also remove carbon dioxide from the air and release oxygen. Thus, plants provide a natural means to achieve cleaner and fresher air at home.

8. Install an Air Purifier

An air purifier with a high-quality filter can remove a wide range of particles. It can also remove odors. There are many types of air cleaners. A simple tabletop model can remove some particles, but a whole-house system captures even smaller particulates. The system’s effectiveness is determined based on how well it collects pollutants and how much air it can draw over time. The best systems have an efficient collection medium and high air-circulation rate.

Grasshopper Heating, Cooling, Plumbing & Electrical Helps Improve Indoor Air Quality in Clifton Park, NY

The first step to achieving long-term IAQ improvements is to have the air in your home tested. We provide indoor air quality testing services to determine the cause of your symptoms and how to resolve the problem. Our professional team is available in Clifton Park, NY, and throughout the Albany area. Call (518) 240-3807 to schedule service.

How To Select A Ductless Mini Split Installer Near You

How to Select a Ductless Mini-Split Installer Near You

A ductless air conditioning specialist in Clifton Park, NY, Grasshopper Heating, Cooling, Plumbing & Electrical knows the top qualities of a mini-split installer. Technology requires knowledge and expertise that only some professionals have.  Ductless mini-splits provide improved comfort and efficiency and can help you save, so it’s important to find the right installer to realize these benefits. But finding the right contractor can be a challenge. Here’s what to do when picking a ductless mini-split installer near you.

Evaluate Their Experience

It’s essential to pick a licensed contractor. But not every HVAC technician specializes in ductless mini-split installation. The process is a bit different than installing a traditional central AC system. When vetting a contractor, ask what the process entails and speak to them as they inspect your home. The technician should have no difficulty explaining the process. They should also make decisions relatively quickly and note any areas of concern they see.

Statements such as “Tell me what works best for you.” or “We’ll do it your way” are red flags, as they mean the contractor may be inexperienced in this area.

Ask/Read What People Say About Them

Reading reviews may seem like an obvious step. But it’s important to know how to read into them. Star and numbered ratings are common. They tend to be accurate. However, only by reading the full review can you understand the customer’s experience, whether the company resolved any unanticipated issues, and kept the client informed the entire time. Aside from web research, ask friends, relatives, neighbors, coworkers, and others if they’ve dealt with the company.

They Seem Ready to Tackle Any Issue

If the installer doesn’t mention any issues, ask if they’ve found any. The wrong contractor may not evaluate the situation thoroughly or not be knowledgeable enough to see any problems coming. A thorough assessment helps to anticipate issues to address so the project can stay on track. 

Their evaluation also lets a contractor provide an accurate upfront quote, without asking for more money along the way. The difference can end up being thousands of dollars. An experienced ductless mini-split installer near you won’t raise such uncertainty.

The Contractor Is Focused on Meeting Your Needs

Never accept a contractor that cuts corners. They should perform a load calculation to determine the right tonnage for your home. A seasonal energy efficiency ratio (SEER) calculation can help find a mini-split unit that’ll save you the most over time. It also helps to schedule installation in the fall or winter; the technician will have the time to be more attentive and put more effort into choosing the right system.

Discuss Price Options and Get a Written Quote

A price quote for a ductless mini-split should list the equipment used plus the cost of materials and labor. Don’t accept generalizations. Every installation is different, and the cost varies from one home to another; the price quote should fall within a range you’ve seen in your research. And make sure to sign the contract before the project starts. Some contractors leave it open so they can adjust their pricing later. Also, ask the HVAC contractor about options and alternatives, which can give you a choice of price levels.

Keep Reading: How the Cost of Mini-Split Installation Near You Is Determined

Choose Grasshopper Heating, Cooling, Plumbing & Electrical

If you live in or near Clifton Park, NY, and are looking for ductless mini-split installers near you, you can trust Grasshopper Heating, Cooling, Plumbing & Electrical for high-quality service. We are EPA-certified and work to ensure successful results and customer satisfaction. For fast, friendly, and professional ductless mini-split installation, schedule an appointment online or call (518) 252-7939.

7-tips-on-deciding-in-favor-of-ac-replacement

7 Tips on Deciding In Favor of AC Replacement

If your home stays cool and comfortable, your air conditioner’s health is probably not a thought. But when the time comes, the decision to pay for a major repair or new AC installation can be challenging. It can also have many long-term repercussions. To make things easier, we’ll provide tips to help decide in favor of AC replacement.

1. Check the Age of Your AC System

Manufacturers often say well-maintained central AC equipment can last 15 to 20 years. But that depends on how much you use it and how hard it works. Various factors can increase wear and tear. If you have and 10- or 12-year-old system that’s inefficient or needs major repairs, consider AC replacement. And if your unit still uses R-22 refrigerant, it’s more cost-effective to install an R-410A system.

2. Determine When Your Last AC Repair Was

As your air conditioner ages, it’ll likely need repairs. But if your last repair was just a month or two ago or you’ve had several service visits in the past year, replacing your AC will save you in the long run. A system should not require significant repairs in its first five to 10 years. Frequent repairs are a sign the unit will cost you even more in the future.

3. Analyze the Repair Estimate

A newer AC isn’t likely to need costly repairs. Plus, it’s probably covered under the factory warranty. Air conditioners in their later years tend to need bigger and more frequent repairs. If your unit costs more to fix than replace, or a repair would cost more than 50% of the price of a new system, AC replacement will reduce long-term costs.

4. Evaluate How Your Is AC Working

Your air conditioner’s performance can tell you how it’s doing. Consult with an HVAC specialist if you notice any of the following signs:

  • Reduced Airflow: If little or no air blows from the vents, your AC may be overworked. The cause can range from a dirty filter to a damaged blower, poorly sized ductwork, or a failing compressor.
  • Poor Temperature/Humidity Control: A failing AC can make your home feel warm and swampy. Unless a dehumidifier or a simple fix can resolve the issue, a technician will recommend an AC replacement.
  • Something Doesn’t Smell Right: A musty smell can mean mold is growing in your ducts. You’ll need a specialist to clean them out. But a burning smell can point to damaged wiring or burnt-out components in your AC system.
  • Run Times Aren’t Right: An air conditioner should turn on and off at regular intervals, even in warm climates. If it runs constantly or shuts off too soon, it may have a dirty or frozen evaporator coil, clogged filter, low refrigerant, or faulty thermostat. Or, the fan, blower motor, or compressor may be going.
  • The AC Is Noisy: Older ACs are normally a little louder. But if your AC is noisier than it used to be, call a technician. Rattling can mean the compressor’s motor mounts are loose. Banging indicates a piston or crankshaft is broken while buzzing can mean there’s debris in the system. A failing blower motor or fan motor can emit a loud squealing sound.

5. Check Your Energy Bills

If you haven’t increased AC usage and your electric company didn’t raise rates, your AC may be the reason for a higher utility bill. Cooling and heating account for a large portion of your energy bills to begin with. If wear and tear or broken parts are causing your AC to work harder, these costs will only increase. An older unit may not meet current efficiency standards anyway, so it’s better to replace it.

6. Do You Have Indoor Air Quality Issues?

If your old AC is affecting indoor air quality, your home may become dustier. It can contribute to increased allergy, asthma, or other respiratory symptoms. You may also notice more pet dander, lint, and smoke residue on surfaces. Mold and mildew may appear on or near vents as well. Whole-home air filtration systems can help. But if the problem is coming from your air conditioner, AC replacement may be a wise choice.

7. Are You Planning to Stay In Your Home?

Installing a new unit may be unnecessary if you’re going to move soon. Nevertheless, a new high-efficiency HVAC system can increase home value. Whether AC replacement makes sense depends on your unique circumstances. If you plan to be there awhile, you’d certainly want a new AC to stay comfortable.

Contact Grasshopper Heating, Cooling, Plumbing & Electrical

Our EPA-certified AC installers can help decide if repairing your AC is worth it or if AC replacement would be more beneficial. We’ll properly size the system for your home and find the most energy-efficient solution. For a consultation and free estimate in your Clifton Park area home, call (518) 241-1847 today.

AC-Repairs-You-Can-DIY

AC Repairs You Can DIY

You can always rely on Grasshopper Heating, Cooling, Plumbing & Electrical for AC repair in the Clifton Park area. But not every air conditioner problem requires a professional. If you like an easy fix, you’ll be glad to hear there are ways to get your AC running again without paying a contractor. These are some steps to fix an AC yourself, or at least get it working so your home isn’t hot and humid.

When Your AC Isn’t Cooling

If your air conditioner is running, but the air blowing from the vents isn’t cool, you can assess the reason why and even correct the issue. Here is how:

  • Check the Thermostat: Is the thermostat set to the correct temperature? If your home is warm and the setting is higher than you’d expect, try lowering it. Also, check that the thermostat is set to “On” (and switch it on if necessary). If the system doesn’t respond to a change in settings or the screen doesn’t light up, change the batteries. The AC should turn on and start blowing cool air.
  • Check the Air Filter: If the air filter is clogged, airflow will be restricted and your home may feel warmer than it should. The filter should be checked every month. Replace it whenever it looks dirty or clogged. Check the sticker on the unit or measure the opening to determine the proper-sized filter to install.
  • Clean the Condensate Drain: The condensate drain is part of a system that removes moisture from the air, so your AC can control the humidity level. To check it, power down your AC at the thermostat. Find the outdoor drain line near the condenser unit. Then locate the indoor access point where you can remove the cap and check for a clog.

The line can be cleaned by adding a ¼ cup of distilled white vinegar, hydrogen peroxide, or hot water with dish soap. Let it sit for 30 minutes and then pour water into the drain line to flush out the clog. Check if water is exiting the outdoor drain line to determine if the pipe is cleared.

  • Look for a Frozen Evaporator Coil: Restricted airflow can cause the evaporator coil to get too cold, allowing ice to form. The first place to look if the coil has frost or ice is the filter. A dirty filter can cause low airflow and frozen coils. If changing the filter doesn’t solve the problem, the unit may be low on refrigerant and require AC repair to fix a leak.

To check the coil, turn off the system at the thermostat and remove the front cover of the air handler. You should see the coils and if there’s ice on them. If so, set the thermostat to “Fan” mode, so warmer air can pass through the coils and melt the ice. Once the ice is gone, return the thermostat to the “Cool” setting. If the AC works as usual, reinstall the cover.

When Your AC Isn’t Running

It’s frustrating to have an air conditioner that won’t turn on. But this doesn’t mean it has died or needs major repairs. Before you call your local HVAC contractor:

  • Check the Circuit Breaker: When the AC shuts off or won’t turn on, see if lights and other devices on the same circuit also don’t work (the unit is most likely on its own circuit). In any case, check the electrical panel and whether the AC circuit breaker tripped. Resetting the breaker should get the unit to turn on again. Otherwise, the circuit may be overloaded or you need an electrician to find and address a hidden wiring or other electrical problem.
  • Clean the Outdoor Unit: Flip the AC switch to the “Off” position and do the same with the circuit breaker. Remove the cover above the fan blades and pull out any leaves, twigs, grass, or nesting materials you see. Lift out the fan and set it down so any wires aren’t damaged. Carefully clean the condenser fins with a garden hose set at light pressure. Wipe down interior surfaces with a damp cloth.

Once the unit is clean, allow it to dry off. Replace any components you removed and reassemble the fan and grill. You can now turn the system back on.

  • Check the AC’s Electrical Panel: A conduit runs from your home to the condenser unit’s electrical access panel. With the power off, unscrew the panel and check for dirt buildups or damage, such as frayed or broken wires, torn insulation, or loose connectors. Wipe off any dirt if necessary. If you’re comfortable doing some work with electricity, you can proceed with these minor AC repairs:
  • Replace the Capacitor: The capacitor stores and releases electricity to help the motors run. Discharge the capacitor before replacing it. Move each wire using a pair of pliers from the old part to the new capacitor and secure it tightly.
  • Replace the Contactor: This relay switch converts the thermostat’s low-voltage power to 220 volts for the compressor and condenser to run. A worn contactor can cause the system to fail. To replace it, unscrew the old contactor, remove its wires, attach them to the new part, and secure the contactor into its fitting.
  • Check the Cartridge Fuses: The fuses are located in the disconnect blocks and can blow, preventing your AC from running. Once you locate the fuses, use an ohm meter at the lowest setting and touch it to each fuse’s red and black leads. A number should appear on the readout. If it’s zero, negative, or infinite, replace the fuse and turn on the power. Call a tech if it blows again.

If these DIY AC repairs don’t get your system running again, or you run into any issues in the process, call your local HVAC professional. They have the skills, tools, and equipment to test for common issues and fix more complex problems.

Call Grasshopper for AC Repair

An AC that won’t turn on or blow cool air, makes loud noises, releases foul odors, or doesn’t stop running are reasons to call Grasshopper. Our NATE-certified professionals will promptly evaluate the unit. They have the tools and parts to get your AC running again in no time. You can reach us 24/7 for emergency service. To request assistance, call (518) 240-9467 now.

indoor air quality testing near you

Indoor Air Quality Testing Near You: What a Contractor Should Look For

The news media often covers outdoor air pollution. But indoor air quality, or IAQ, is just as important. Biological, chemical, and combustion pollutants may be present in your home. They can cause anything from mild irritation to long-term health issues. When you schedule indoor air quality testing near Clifton Park, a contractor should look for the most common pollutants. We’ll provide an overview of these so you’re more informed the next time your IAQ is tested.

IAQ Pollutants to Look For

According to the U.S. Environmental Protection Agency (EPA), indoor pollutants can be broken down into three categories:

Biological

A wide range of biological hazards may be found in your home. Sneezing, coughing, watery eyes, shortness of breath, and asthma symptoms may be occurring for a reason. Since there are so many types of biological pollutants (including bacteria and other microorganisms), and so many tests, knowing what to look for is important. Some of the most common you might suspect include:

  • Mold: Mold exists outdoors and indoors and travels via airborne spores that settle and colonize in dark, humid areas. It can also be carried indoors on your shoes and clothing. Mold can cause musty odors, while some types release toxic compounds that can make you sick.
  • Pollen: Pollen grains from trees, grasses, and weeds are prevalent during the warmer months. They can float inside or be carried in by people and pets, and trigger symptoms of hay fever. The best ways to avoid exposure include keeping windows closed and staying inside when pollen counts are high.
  • Dust Mites: Feeding off dead skin cells, dust mites can thrive in carpets, bedding, and furniture and produce potent allergens (despite being too small to see). If a test finds dust mites, their levels can be reduced with a dehumidifier or AC, impermeable mattress/pillow covers, by vacuuming/wiping up dust and washing bedding in hot water.

Chemical

Chemical pollutants come in many forms. If you’re scheduling indoor air quality testing near you, make sure the contractor considers any compound that can cause indoor air pollution, irritation, or illness. These include but are not limited to:

  • Volatile Organic Compounds (VOCs): These “volatile” compounds easily become vapors or gases. Containing carbon, they can occur naturally or be synthetic. Home cleaning products, disinfectants, paints, wood preservatives, dry-cleaned clothing, stored fuels, craft supplies, building materials, and furnishings may contain VOCs. Some VOCs are relatively harmless, while others are highly toxic, such as benzene and perchloroethylene.
  • Formaldehyde: It’s a common VOC found in paints, glues, insulation, paper products, permanent press fabrics, and as a preservative in some cosmetics, personal care products, and medicines. According to the Department of Health and Human Services, formaldehyde is a known carcinogen. The Centers for Disease Control and Prevention recommends testing for formaldehyde if there are strong chemical odors or if you have breathing problems and irritation only at home.
  • Lead: Lead was used in pipes, pots, and pans in Ancient Rome and, more recently, in paint and batteries. The U.S. government banned lead-based paint in 1978. When airborne, lead can be inhaled or swallowed. At high levels, it can cause convulsions, coma, and death; at low levels, it can harm the central nervous system, kidneys, and blood cells. Test for lead if you have children at home, you live near a freeway or congested roadway, or your home was built before 1978.
  • Radon: Radon is a radioactive, colorless gas that forms in soil. Cracks and holes in your home’s foundation can allow it to get inside. If radon particles get trapped in the lungs, they can cause tissue damage and lung cancer. The EPA has recommended radon testing in all homes below the third floor. Short- and long-term tests are available; a trained contractor can determine the best type of test and way to lower radon levels if necessary.

Combustion

Combustion pollutants contain gases and particles that can be a hazard to your health and safety. They are produced from burning fuels. Testing for combustion pollutants can help determine what preventative measures to take. Your contractor should look for:

Environmental Tobacco Smoke (ETS): Also known as secondhand smoke, ETS contains thousands of compounds and dozens of carcinogens, which can put even non-smokers at risk. Secondhand smoke is a known cause of respiratory problems in children. The best way to prevent exposure to ETS and its health effects is to avoid smoking inside the home.

Carbon Monoxide (CO): This colorless, odorless gas can lead to unconsciousness and death in high concentrations. Even low concentrations of CO can cause a range of symptoms, including headaches, dizziness, nausea, fatigue, weakness, and confusion.  An unvented fireplace, gas space heater or stove, or woodstove can release CO. A malfunctioning gas furnace can also release it into the air. Other combustion pollutants include nitrogen dioxide and particulates.

Improving Indoor Air Quality

To improve IAQ, it’s important to follow your contractor’s recommendations. But you can make improvements even before having your home tested, such as eliminating or reducing pollution sources, ventilating your home, and changing HVAC filters often. A technician will look at the presence and level of a pollutant when performing a test. According to the EPA, here are some acceptable levels:

  • Lead: No more than 0.15 µg/m3 over a 3-month rolling average.¹
  • Carbon Monoxide: Less than 9 ppm over 8 hours and less than 35 ppm over 1 hour.¹
  • Nitrogen Dioxide: Less than 100 ppb over 1 hour and under 53 ppb over 1 year.¹
  • Particulate Matter: Primary and secondary particulates should not exceed 15 µg/m3 over 24 hours (as of standards updated in 2012).²

Call Grasshopper to Schedule Indoor Air Quality Testing Near You

Poor indoor air quality is associated with many symptoms and diseases. With indoor air quality testing, common pollutants and their sources can be identified. We can then recommend steps to reduce or eliminate biological, chemical, and combustion pollutants. To request service in Clifton Park, NY, and surrounding areas, contact us online or call (518) 241-1758.

Sources:

  1. https://www.epa.gov/criteria-air-pollutants/naaqs-table
  2. https://www.epa.gov/pm-pollution/timeline-particulate-matter-pm-national-ambient-air-quality-standards-naaqs


7-Ways-You-Can-Benefit-from-AC-Replacement-in-Latham-NY

7 Ways You Can Benefit from AC Replacement in Latham, NY

As a homeowner, you may have reasons to keep your old air conditioner going. But the basis for replacing it may be growing by the day. No AC lasts forever. The longer you wait, the more likely you’ll face a rush decision after a complete breakdown. Planning can help save and see many benefits of AC replacement in Latham, NY, including:

1. Improved Reliability

After years of excessive use, an AC can become less reliable. Air conditioners are known to decline in performance after 10 years. The summer months in New York often bring persistent heat. While you might not use your AC all year long, wear and tear still add up. 

A new unit is unlikely to need repairs. It should provide reliable temperature and humidity control no matter the outside temperature. Plus, there’s the peace of mind of knowing it won’t break down anytime soon.

2. Reduced Repair and Maintenance Costs

Typically, the older an AC gets, the more repairs it needs. If the unit needs fixing just about every month, or a repair costs over 50% of the price of installing a new AC, consider replacing it. Your air conditioner should also not need maintenance more than twice a year. If it does, a new machine will save you financially and mentally.

3. More Precise Temperature Control

It’s no fun to have rooms that are too warm and others too cold. While an older AC can struggle to keep up, a new unit sized for your home will keep every room comfortable. You won’t be dealing with inaccurate thermostats, refrigerant leaks, cracked air ducts, damaged motors, and other issues common in aging AC systems. 

4. Manageable Operating Costs

Replacing your AC eliminates costly issues like the unit running constantly and overworking itself. Improved energy efficiency is one of the greatest benefits of AC replacement in Latham. A new system will cycle properly, and the thermostat will be more accurate, saving energy. You can save even more by investing in a programmable thermostat and setting the temperature back a few degrees.

5. Quieter Performance

A new AC will be free of loud, distracting noises. Call your HVAC contractor if there are unusual sounds; they can determine if a faulty part or your entire system should be replaced. Popping sounds can occur as duct materials expand and contract with temperature changes or air movement; excessive noise can mean ducts are wearing out. Squealing or grinding can indicate that a motor or fan belt is failing. If you hear buzzing, the system may have a refrigerant leak, a damaged compressor, or loose parts.

Any noise from your HVAC system can travel through air ducts and echo off walls and throughout your house. If you have an older unit, consider replacing it. Your home will be a quieter and more peaceful place.

6. Improvements in Indoor Air Quality

Older HVAC systems are notorious for producing more dust. Ventilation issues can cause dirt, allergens, pet dander, and other contaminants to fill the air in your home. Installing a new unit can eliminate the problem and reduce the humidity level. It can also resolve moldy, burning, or electrical odors from your AC. They use a more environmentally friendly refrigerant as well.

7. Increased Home Value

A new AC system is an investment that can increase your home’s value. If you plan to stay a while, you’ll have a healthier place to live and enjoy. A higher resale price is another benefit of AC replacement. Potential home buyers won’t deal with issues related to an aging HVAC system or spend money to replace it. Therefore, AC replacement can increase the asking price while making your home a more attractive buy.

Contact Us About AC Replacement in Latham, NY

At Grasshopper Heating, Cooling, Plumbing & Electrical, our EPA-certified professionals follow all the necessary standards and safety protocols. Punctual and effective, they install your AC unit correctly and avoid mistakes. If there are signs that it’s time to replace your air conditioner, we’ll ensure you fully benefit from high-quality AC installation. Call (518) 241-1847 to schedule your free estimate and ask about specials and financing.


What-Does-an-Air-Conditioning-Tune-Up-Entail

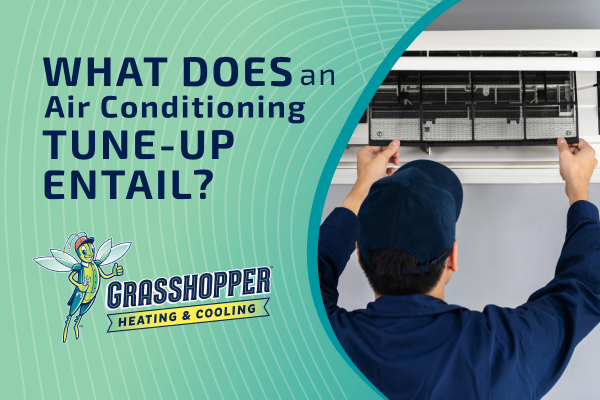
What Does an Air Conditioning Tune-Up Entail?

Most HVAC professionals suggest scheduling an air conditioning tune-up once a year. You may be more familiar with the concept of an automobile tune-up. The idea works similarly with an AC, which is also a complex machine with many moving parts. Basically, it means an expert technician is providing maintenance service and an inspection.

An AC tune-up has many benefits, from helping your HVAC system run more reliably, lowering utility bills, and improving equipment life expectancy. It can avoid bigger repairs and save money over the life of the system. But what does the process of tuning up your air conditioner entail? To answer this question, we’ll now provide an overview of the process.

What AC Maintenance Service Includes

A maintenance technician will usually start with the basics. They often first look at the thermostat and whether it’s working and set correctly. Lowering the temperature a few degrees enables them to evaluate how your AC responds.

Next, the inspector will most likely check the air filter. If the filter is dirty, it will be replaced. This is one of the simplest but among the most important AC maintenance tasks. A clogged filter will restrict airflow, reducing performance and forcing the unit to work harder. It can also risk contaminating the unit and the air in your home with dust and dirt.

Other steps to an air conditioning tune-up include:

System Inspection

The AC inspection is a vital part of a tune-up. A visual look at key components lets the technician find signs of wear or damage. When inspecting an air conditioner, a contractor will:

  • Check Refrigerant Levels: A professional has the equipment to measure the coolant in your AC system. Low refrigerant levels will prevent the unit from cooling the air properly or at all. The compressor can also overheat and burn out. If necessary, the technician will recharge the refrigerant and check for and seal any leaks.
  • Clear the Condensate Drain: Condensation forms as your AC cools the air. It’s collected by a condensate drain pan and drained by a small pipe that carries water away. This water can build up if there’s damage or a clog. Most systems have a sensor that shuts them down if this happens. Otherwise, a condensate backup can cause major water damage to the AC and your house.
  • Examine the Condenser Unit: The technician will open the housing to check the fan motor, switches, valves, refrigerant lines, run capacitor, and electrical connections. In addition, they’ll clean the interior and exterior of the condenser while ensuring the area around it is clear of debris and encroaching trees and plants.

Clean the Coils

Cleaning the condenser and evaporator coils is important because dirt can easily collect on them and interfere with heat transfer. The evaporator coil in the indoor unit absorbs heat to cool the air. The condenser coil releases this heat outside so the cycle can repeat. Dirty coils can become damaged due to freezing, overheating, or increased wear. An AC professional has the tools to clean them safely and effectively to avoid damage.

Replace Worn-Out Parts

An air conditioning tune-up allows a technician to find parts that are no longer functioning properly. Aside from the capacitor, commonly replaced parts include the contactor, relay, blower wheel, fan motor, fan blades, motor belts, and corroded evaporator coils. Replacing these parts can prevent excess wear and damage to other components and prevent a total system breakdown.

Other Air Conditioning Tune-Up Steps

Your local AC contractor will complete several other steps during a maintenance call. During an annual AC tune-up, they will:

  • Assess the start-up and cooling process
  • Examine and test safety controls
  • Measure system airflow
  • Lubricate all moving parts
  • Check and tighten electrical connections
  • Measure motor voltage and amp draw
  • Check for and mitigate microbial growth
  • Make sure all parts are securely connected

After inspecting, cleaning, adjusting, and possibly repairing your AC unit, the technician will review their findings and what they have done. They can provide suggestions on how to improve efficiency and estimate how long until the system may need to be replaced. But before leaving, they’ll ensure your AC is ready to provide reliable cooling all summer.

Schedule an AC Tune-Up with Grasshopper Today

At Grasshopper Heating, Cooling, Plumbing & Electrical, our NATE-certified technicians provide air conditioning tune-ups throughout Clifton Park, NY, and surrounding areas. Our team will verify whether your unit is operating normally and correct any minor issues they find. The components of your AC system will be inspected and cleaned. To schedule AC maintenance, submit your request online or call (518) 240-3807 today.