Rated: 4.9 / 5 based on 2,600+ reviews. Read our reviews

Available 24/7! Call now to schedule! (518) 545-3271

Author: Amanda Triolo

Purify Your Home Water Supply with HALO Water Filtration Products

Grasshopper Heating, Cooling, Plumbing & Electrical is proud to offer some of the most effective whole-home water filtration systems on the market. Tap water can contain many unwanted compounds. For example, it may have 3-4 times more chlorine than pool water. You wouldn’t bathe or brush your teeth with pool water, so why would you take a chance with municipal water with an even higher concentration of potentially harmful chemicals?

What’s In Your Water?

Water utilities often add chlorine as a disinfectant. It’s considered generally safe at low levels but can give water an undesirable taste or odor. Grasshopper can check your water supply to see if higher levels of chlorine or other contaminants are present. These can include:

  • Hard Water Minerals: Minerals in the water, like calcium and magnesium, aren’t a health risk, but they can cause limescale to form in pipes, which can damage your plumbing. They can also leave stains on dishes, silverware, and clothes.
  • Heavy Metals: Lead and other heavy metals from old pipes can leach into your water supply. Children are especially vulnerable to lead exposure. Many home water filtration systems can remove heavy metals.
  • Arsenic: If you use well water, low levels of arsenic may be present. High levels of arsenic have been linked to reduced brain function in children as well as diabetes, heart disease, and cancer. If you have concerns, Grasshopper can test your water supply.

Tap water can also contain aluminum, copper, and iron as well as pesticides. Traces of plastic waste, harmful chemicals, and even radioactive compounds have been identified in municipal water sources.

Let Grasshopper Help Purify Your Water

We offer various solutions to make municipal water safe for your household. Some can even reverse the damage caused by hard water and help protect the environment. You can save money on plastic bottles and protect the environment by not having to throw them away. The HALO products we offer give you great-tasting, highly filtered alkaline water for just pennies per day (meanwhile, a jug of bottled water can cost several dollars, so you end up spending hundreds of dollars a year on water).

By investing in a whole-home water purification system, you can have water that matches the formulation of that found in Blue Zones. These are regions where people often live into their 90s and beyond. You too can have the same quality water for cooking and drinking and reduce your risk for disease.

Enjoy the Benefits of HALO Water Filtration

Many households rely on salt-based water softeners. Their backwash can produce a toxic sludge that pollutes septic systems and the environment. We can install an environmentally safe technology that eliminates pouring bags of salt into your water softener. This fully warrantied, space-age technology can last for 25 years and includes:

H2 ZERO

The H2 ZERO is a two-tank system. Tank 1 contains High Activity Carbon that effectively removes chlorine and purifies water at a range of pH levels. It yields clean, fresh water that’s free of any strange tastes or odors. For Tank 2, there are a couple of options. You can choose a HALO ION In-line Water Conditioner that uses magnetic fields to alter the molecular structure of calcium and magnesium so minerals remain suspended in water. A scale media option with no salt is also available.

HALO ION 2.0

The HALO ION 2.0 In-line Water Conditioner is installed in line with existing pipes. Its multi-reversing polarity magnetic fields help keep dissolved minerals suspended so they don’t contribute to limescale and corrosion. The system does not require a drain line and no electricity or chemicals are needed for it to work. It is available in several different sizes to meet the needs of your home, in flow rate capacities from six to 50 gallons per minute.

Contact Grasshopper Heating, Cooling, Plumbing & Electrical

We’re proud to offer advanced whole-home water filtration systems in and around Clifton Park, NY. These include the H2 ZERO and HALO ION 2.0, which our technicians are experienced in installing to help protect your health and plumbing system. Contact us to learn more about these and other products that can also remove plastics, metals, chemicals, and other common tap water pollutants. To have your questions answered by a friendly, knowledgeable representative, and to schedule your in-home evaluation and free estimate, call (518) 241-1762 today.
Urgent Signs You Need a Heating System Repair

You may be experiencing urgent signs to call for heating repair near Clifton Park, NY. At Grasshopper Heating, Cooling, Plumbing & Electrical, our EPA-certified HVAC technicians are available 24/7 to provide heating system repair. The longer you wait, the more damage that can occur, and the greater the risk to your safety and that you’ll need to replace your furnace, heat pump, or thermostat. 

Heating systems are more likely to develop problems and break down during the coldest days of the winter. The smallest issue can be dangerous, especially if your home is without heat for an extended time. We understand the urgency, so let us know and our experienced professionals will quickly diagnose and fix the problem, no matter its size or scope or the brand, type, or model of your heater.

Here are some of the most common signs you need to call for heating repair:

Your Home Is Too Cool

You’ve turned the heat up full blast. Yet, the air blowing from the vents is lukewarm or downright cold. Perhaps some parts of your home are warm and other spots are chilly. Being left shivering in the cold is not only uncomfortable; it can be dangerous. Whether the cause is a faulty thermostat or a bad part in your heater, it must be resolved right away.

It’s Harder to Control Your Heating System

If you keep turning the thermostat higher and higher to get comfortable, something is wrong. Your heating system isn’t working as effectively. The more you turn up the heat, the more energy the system will use. Prompt heating repair will restore your comfort, keep your utility bills down, and may help your furnace or heat pump last longer.

Your Electric Bill Is Higher Than Ever

A high electric bill can mean you have an urgent heater problem. By now, you should know the rates your utility company charges in winter. Besides, rates are usually increased gradually. A sudden spike in your bill likely means you need a heating system repair. If a component is malfunctioning, your heater will work harder to compensate. The increase in energy consumption will raise your monthly bill.

Loud Noises from Your Heater

Call your local heating company if you hear banging, rumbling, thumping, clanking, squeaking, whistling, or rattling noises from your heater. These are signs of potentially serious issues. These can range from a frayed belt to a loose bearing to a problem with the ignition assembly. If there’s any other sound than air flowing from the vents, call for help before your heater breaks down.

Poor Air Quality

If your home is dustier than usual, no matter how much you clean, the furnace blower may be malfunctioning. Reduced air pressure can let dust settle in air ducts, which then gets re-circulated around your home. You’ll notice dust on surfaces and on the vent grates. Various contaminants, including mold and mildew, may also circulate. If not fixed, this heating problem can increase the risk of respiratory illness.

The Carbon Monoxide Alarm Goes Off

Don’t assume the carbon monoxide (CO) alarm is malfunctioning. It’s designed to detect a colorless, odorless gas that can cause serious illness or death. Hearing the alarm is an urgent sign you need heating system repair, but first, leave your home immediately and then call your local HVAC company to figure out the problem and fix it. A common cause of a CO leak is a cracked heat exchanger.

Unusual Odors In Your Home

A persistent burning odor (other than when your heater first turns on for the season) can indicate a serious problem, while a smoke odor can mean your chimney is blocked. Plastic odors can mean a component is failing. However, a rotten egg odor is the most concerning; it signals a natural gas leak (due to a compound added by the gas company). Evacuate your home immediately and call for help.

How Much Does a Heating System Repair Cost?

It can cost a few hundred to over $1,000 to fix a heating system, depending on the type of unit, what is wrong with it, and the extent of the damage. Parts and labor costs also factor in.

When Should I Replace My Heating System?

If your furnace is over 15 years old, has been fixed several times recently, and is inefficient, consider replacing it. The cost of repairs is also a consideration. If compared to buying a new unit, fixing your heater costs more than half that expense, it’s time for an upgrade.

Contact Grasshopper Heating, Cooling, Plumbing & Electrical

Our team of qualified professionals can provide any type of heating system repair. We’re always upfront with pricing and offer free estimates. Additionally, Grasshopper is committed to your satisfaction and helping prevent further costs. All your repair options will be explained before moving forward, and a heating failure or breakdown will be fully addressed to restore comfort, safety, and efficiency. For high-quality heating repair near Clifton Park, NY, you can reach us 24/7 at (518) 252-7937.

8 Reasons to Consider Water Heater Replacement Now

Generally, tank-based water heaters last 8 to 12 years (tankless units are known to last up to 20 years), but there are reasons to consider water heater replacement at any time, regardless of the unit’s age. A person uses hot water up to 20 times a day on average. Therefore, a water heater undergoes a considerable amount of wear and tear during its lifetime. Signs of a failing system should be noticeable, although some appear more subtly as the system ages.

We’ll look at the reasons to replace a water heater in Clifton Park now, so you’re not suddenly without hot water and waiting for a new unit.

1. Inconsistent Water Temperatures

No hot water is surely a sign your water heater needs attention. However, the symptoms of a declining system are often more subtle. Hot water should be between 120℉ and 140℉ and stay at the set temperature. In other words, it should be consistently hot. If the water temperature suddenly starts fluctuating between hot and cold and back again, or hot water starts running out much faster than before, it’s time to consider water heater replacement.

2. Hot Water Looks Rusty

Rust is not good, no matter where it shows up. If your hot water is coming out brown or rusty-looking, chances are there’s corrosion inside the water heater tank. Call a professional if this is so or if you see discolored or cloudy water. The issue could be due to old pipes. But if your water heater is getting up there in age, it could be contributing to rusty tap water.

3. Poor Water Quality

A defunct water heater may not only release water that looks rusty. Water quality may be unsafe. Poor temperature regulation can allow bacteria, many of which can cause illnesses, to form in the water. If tap water has a metallic smell and taste, corrosion in the tank may be wearing it out and causing the lining to deteriorate and break up. Therefore, your water supply ends up filled with particles that shouldn’t be there. 

4. The Water Heater Is Noisy

Tank sediment becomes more problematic as water heaters age. Loud rumbling or banging sounds mean hardened minerals and particles are heating up and being pushed around in the tank, which can eventually cause it to crack. Nonetheless, there can be various sources of noise. If your water heater is becoming louder, it’s best to call a technician to inspect it, find the source, and determine whether you need a repair or water heater replacement

5. Water On or Around the Unit

Whether you see water dripping down the side of the water heater or pooling around its base, it’s not a good sign. The tank has likely eroded and is in danger of failing. Leaks can also be caused by loose connections or old pipes. Condensation is another issue to look for; it often causes small pools of water to appear intermittently but can indicate a potentially serious problem. Call a professional if you see any water outside your water heater.

6. Frequent Repairs Are Needed

Even if your water heater is in mid-life, frequent repairs will cost you more than necessary. Premature wear can be due to heavy usage or a lack of maintenance. If you’re calling a plumber once every few months to fix your water heater, replacing it can save you the cost of dealing with more repairs in the future. 

7. Increasing Utility Bills

Hikes in utility rates aren’t uncommon. However, steady or sudden spikes in your water bill are suspicious. Your water heater may be leaking or running inefficiently. Also, monitor your electric bill. If your water heater is working harder to maintain a consistent supply of hot water, replacing it may be the only way to keep your utility bills in check.

8. The Water Heater Is Over 15 Years Old

Kudos if your water heater has lasted this long. But is it working as well as it once did?
The system is most likely less efficient and there’s a higher risk of it breaking down, leaving you without hot water. Schedule an inspection by a licensed plumber as soon as you can. They’ll help determine its condition and whether you have a reason to consider water heater replacement.

Clifton Park, NY Water Heater Replacement Company

At Grasshopper Heating, Cooling, Plumbing & Electrical, we’re experts in high-quality, budget-friendly water heater replacement. Our technicians are EPA- and NATE-certified, so you can expect the best in service. You can reach us 24/7 in an emergency, and we’ll send a team equipped to diagnose and fix the problem or determine whether to replace your system. Financing is available and we’ll even provide a free estimate on your new water heater. Contact us at (518) 241-1642 for assistance.

Source:

https://www.bobvila.com/articles/when-to-replace-a-water-heater/

Reasons-to-Schedule-Furnace-Replacement-Before-a-System-Failure

Reasons to Schedule Furnace Replacement Before a System Failure

You shouldn’t wait before your heating system fails to schedule a furnace replacement. Whether your furnace is near the end of its lifespan or not that old, there are many good reasons to consider an upgrade. You can replace your heating system at any time. However, we recommend doing so in the fall before it gets too cold. Winters in Upstate New York tend to drag on for several months, even after the official end of the season, so you’ll appreciate having reliable heat. Here are a few reasons we recommend furnace replacement before your system fails:

You Can Avoid Dealing with a Heater Breakdown or Failure

When a furnace breaks down, it’s usually at the worst time. The high demand during the coldest weather can set a failing system over its limit. Replacing your heating system before the winter season avoids expensive emergency calls. It also avoids paying more to repair or replace the unit compared to the off-season when prices are lower. You also eliminate the costs of frequent repairs, which can add up to more than purchasing a new furnace.

Monthly Energy Bills Can Be Reduced

An aging furnace loses efficiency over time. However, older units also use more energy than newer models. The energy usage of a furnace is determined by its annual fuel utilization efficiency (AFUE). A combustion furnace must have an AFUE of at least 80%; your older unit may be less than that. However, a newer system is likely to have an AFUE of 95% or greater so little, if any, fuel is wasted while producing heat. This results in a substantial decrease in your monthly energy bills.

Your Home Will Be More Comfortable

Signs of a failing furnace include:

  • Parts of your home are too warm.
  • Some rooms are drafty or too cool.
  • The heater runs longer, but your home is less comfortable.
  • Your home’s air is too humid.
  • There are mold and indoor air quality issues.
  • Your furnace makes banging, popping, rattling, or squealing noises.
  • Lots of dust and dirt come from duct vents.

Scheduling furnace replacement before the system fails can resolve all these problems, including issues that can impact your health. Poor indoor air quality (IAQ) can make life difficult for people with allergies, asthma, and other respiratory problems. Installing a new furnace and changing the air filter regularly will improve IAQ. 

At the very least, every room will be warm and cozy, so your home is the refuge from the winter cold, snow, and ice that it should be.

Your Family’s Safety

An older furnace, especially one over 15 years old, is more prone to issues that can impact your safety. A unit on the brink of failure may leak carbon monoxide (CO), which is deadly despite being colorless and odorless. Issues with ventilation or a cracked heat exchanger can cause CO to build up. If an ignitor, pilot light, or burner malfunctions, it can trigger a fire that may spread beyond the furnace and the space around it, causing extensive property damage. Therefore, furnace replacement should be considered, even if it’s only for the safety of your household.

You Can Avoid Delays In System Replacement

If your furnace fails during extreme weather, limited product availability can cause delays, leaving you without heat for some time. Poor weather and road conditions can prevent a heating contractor from reaching your home quickly. At the very least, options may be limited and you’ll have less time to plan. Therefore, you may end up with a furnace that’s outside your budget or not ideal for your home.

Should You Schedule Furnace Replacement Now?

Furnaces in Clifton Park and surrounding areas work hard throughout the winter. Wear and tear take a toll on your heating system. Considering a replacement sooner allows you to receive professional advice from a heating expert. At Grasshopper Heating, Cooling, Plumbing & Electrical, our technicians can advise you on the best make, model, and size of heater for your home that runs reliably, quietly, and efficiently and reduces your carbon footprint.

Call Grasshopper Today

You can expect free estimates, upfront pricing, and exceptional service from Grasshopper Heating, Cooling, Plumbing & Electrical. Our NATE-certified technicians provide sound advice and customized solutions for your home. High-quality, energy-efficient products, our commitment to customer satisfaction, and our specials and financing options show improving your comfort and well-being is our priority. To schedule furnace replacement before your system fails, call (518) 241-1758.

Furnace-Maintenance-Steps-You-Dont-Want-to-Skip

Furnace Maintenance Steps You Don’t Want to Skip

Skipping yearly furnace maintenance can lead to costly repairs and breakdowns, and there are maintenance steps you don’t want to skip. At Grasshopper Heating, Cooling, Plumbing & Electrical, we offer annual inspections and tune-ups as part of a comprehensive furnace maintenance plan. However, there are some DIY tasks you don’t need a professional for, but that can make a big difference in the health of your furnace.

Before performing any work on your furnace, turn off the appliance and the power at the breaker box. Now, you can proceed with the following furnace maintenance steps:

Clean or Replace the Filter

Depending on the type of filter, clean or replace it every one to three months. Most filters slide in and out of a housing. It’s a simple process, but turn off your furnace first. Otherwise, unfiltered air may be forced through the system and into your home. Make sure the new filter is the same type as the old one and compatible with your heating system. Remove the old filter carefully to avoid spreading dust or debris.

Perform a Simple Thermostat Check

A professional should test and calibrate your thermostat during annual maintenance. However, you can test the thermostat yourself by using a temperature sensor to verify its reading is correct. You can also test fan speeds and system dampers. With the furnace off, inspect the wiring connections and tighten any that are loose. If there’s dust and debris on wires, use compressed air to clear away any dirt.

Inspect the Blower Unit

Your furnace produces heat. The blower fan ensures heated air reaches each room. Once you access the blower, check whether the fan blades are dirty; if so, clear any dust or debris. Call a professional if they appear broken or if there’s an issue that can’t be resolved with simple DIY furnace maintenance

The fan wheel should spin without any resistance. Also, check the belts and pulleys for any damage or issues with tension. Other than cleaning the fan blades or lubricating moving parts with oil, call for help if you notice any damage or something out of place. Even minor damage can cause strain on other parts and lead to more costly repairs.

Inspect and Clean the Burners

It doesn’t take carbon and soot long to build up if there’s an issue with the burners. Any buildup can interfere with how your furnace performs. But there are things you can do to address the problem. First, turn off the power and gas. Then, open the panel and vacuum debris from on and around the burners.

Inspect the burners for buildup around the channels and openings where the flame comes from. It can be removed with a brass wire brush. To clear the manifold, remove any debris using a thin wire or paperclip. A dirty flame sensor can be cleaned with a scouring pad, but be gentle to avoid scratching or breaking the housing. However, if the ignitor looks damaged or dirty, hire a professional to replace it.

Check Ductwork

You can’t see all the ductwork without specialized equipment, but you can open grilles and registers to see inside branch ducts. Visible dirt and dust can be vacuumed out. Mold can often be cleaned with a light detergent and a sponge or brush. Wear gloves, a mask, and safety glasses when doing so. You can also use an anti-fungal spray to disinfect the area and prevent the mold from coming back.

Using a flashlight, look for signs of damage to air ducts. Then, inspect visible ductwork in places like the attic, basement, or crawlspace. If there are holes, cracks, spaces between seams, corrosion, or kinked or crushed ducts, call an HVAC contractor as soon as possible.

Check Your Carbon Monoxide Detectors

Your carbon monoxide (CO) detectors are a critical line of defense in protecting you from a serious hazard. Although not a part of your furnace, CO detectors should be checked. Testing each unit and changing the batteries (if applicable) will ensure they work should there be a carbon monoxide leak from your heating system. 

Contact Grasshopper Heating, Cooling, Plumbing & Electrical

It takes experience and training to properly maintain a furnace and spot developing problems. The DIY tips above can help your furnace work more efficiently and last longer. However, don’t forget to schedule annual furnace maintenance or call if you notice issues such as reduced efficiency, short cycling, low air pressure, or reduced heating performance. We follow a comprehensive checklist to prevent major repairs, avoid breakdowns, and ensure your heating system is in peak condition. To schedule service, contact us online or call (518) 241-1762.

8 Furnace Installation Mistakes That Can Jeopardize Your Safety

Any mistake during furnace installation can jeopardize your safety and lead to a fire or carbon monoxide leak. Temperature fluctuations, humidity issues, and noise are also possible. At the very least, a poorly installed furnace will run inefficiently and increase energy costs, require more repairs, and may not last as long. Therefore, furnace replacement is not a DIY job. The following mistakes can create significant safety hazards:

1. Hiring an Inexperienced Contractor

Finding an HVAC installer that is licensed, certified, and insured is critical. Make sure they have several years of experience installing furnaces. An inexperienced contractor or a handyman doesn’t likely have the knowledge required to complete the job and avoid costly mistakes and safety hazards. Always check a professional’s reviews and background before hiring them; also, avoid going for the cheapest bid.

2. Selecting a Furnace That’s the Wrong Size

One of the biggest furnace installation mistakes is choosing one that’s too big or too small for your home. Bigger is never better when it comes to heating systems. A technician must perform the proper calculations to determine the right size and capacity for any HVAC unit, whether it’s a furnace or air conditioner. 

Don’t automatically assume your old furnace is the right size. It may not be. The load calculation is an important part of the process and ensures your heating unit will work efficiently and operating costs will be kept in check.

3. Poor Ductwork Design and Installation

For your heating system to be safe and effective, your duct system must be properly designed. It will then allow heated air to get to where it’s required. Improperly sized ductwork won’t match the unit’s output capacity. And old ductwork may have leaks that can impact efficiency. 

To avoid efficiency problems, heat loss, and airflow problems, have a professional evaluate your ductwork. They’ll ensure it’s properly sized, sealed, and insulated. An experienced contractor will also ensure a seamless installation of ducts, supply and return vents, ceiling diffusers, etc.

4. Failing to Meet Ventilation Requirements

Poor ventilation or a lack thereof can cause carbon monoxide to build up. This can be a deadly situation for your household. Intake vents, exhaust pipes, flues, dampers, and related components must be correctly installed to avoid a buildup of toxic gases.

5. Installing the Furnace in the Wrong Place

During the furnace installation process, the contractor should identify a spot where the unit can be properly ventilated and they can access it for maintenance and repairs. Registers and return grills must also be installed where there are no obstructions. Meanwhile, placing exhaust vents where they’re unlikely to get blocked improves safety, and the outdoor unit your furnace is connected to should be in an open area where vegetation, leaves, branches, and foliage won’t interfere with its performance.

6. Incorrect Drain System Design

A furnace generates moisture and condensation as it heats the air, which must be drained away. If the drainage system is poorly designed, there’s a risk of leaks and water damage to your home. Water can also back up in pipes and freeze when it’s cold outside, potentially leading to HVAC system failure. Your safety can be jeopardized by mold and indoor air quality issues as well.

7. Installing the Thermostat Incorrectly

Furnace installation involves installing several components, including the thermostat. If it’s not correctly placed and connected, it will have difficulty communicating with your heating system, resulting in poor temperature control that can leave your home dangerously cold or hot. A professional will properly connect the thermostat, calibrate it, and perform tests to ensure the system is capable of effective temperature control.

8. Forgetting to Register the Warranty

The manufacturer’s warranty must be registered for you to take advantage of it if there’s a defect or repair issue. Furnace repairs are often expensive, so it’s important to have warranty coverage. Also, follow all maintenance guidelines (including professional tune-ups and installation) to keep your furnace in peak condition and prevent voiding the warranty.

Call Grasshopper Heating, Cooling, Plumbing & Electrical for Furnace Installation

Our experienced NATE-certified professionals provide furnace installation that includes help finding the right make and model of heater for your home. We use only high-quality parts and materials. Customer service is also our top priority, and we are A+ rated by the Better Business Bureau. To schedule furnace installation or replacement or learn more about our specials, maintenance plans, and financing options, call (518) 255-7331 or contact us online.

A-Guide-to-the-Top-3-HVAC-Services

A Guide to the Top 3 HVAC Services

In this guide to the top 3 HVAC services, our goal is to help you understand what it takes to have a reliable, efficient, and long-lasting heating and cooling system. These primary services—maintenance, installation, and repair—are all crucial in ensuring your air conditioner or furnace works safely and effectively. Here is an in-depth look into each of them.

HVAC Maintenance

Maintenance is an important yet often overlooked HVAC service. It can reduce energy consumption and save money on utility bills and repairs. Maintenance can also help put off replacing the system. 

Your HVAC system should be tuned up by a professional twice a year. Your air conditioner should be serviced in the spring and your heater in the fall. During a maintenance visit, a technician will check the thermostat and calibrate it if necessary, tighten electrical connections, and lubricate moving parts. They’ll also inspect and clean the condensate drain, evaporator and condenser coils, and blower components.

Other important tasks only a trained professional can do include:

  • Measure the refrigerant level
  • Inspect/tighten fuel line connections
  • Check gas pressure and burner combustion
  • Test the system’s controls/safety features
  • Make small repairs

However, there are simpler tasks you can do in between maintenance visits that can help your HVAC system:

  • Change the air filter every 30 to 90 days.
  • Inspect the system for potential problems (low thermostat battery, clogged condensate drain, damaged flue system, blocked registers, moldy vents, unlevel outdoor unit).
  • Remove clutter from the indoor air handler.
  • Keep the outdoor unit clear of leaves, twigs, grass clippings, and debris.
  • Test the carbon monoxide detector every month (it can warn of an exhaust leak, gas line problem, or poor ventilation).
  • Check your energy bills for unexpected spikes or gradual increases in consumption.
  • Install a programmable thermostat to improve temperature control based on demand.

HVAC Installation

Proper installation ensures your air conditioner provides adequate cooling during the summer and your furnace or heat pump keeps your home warm in winter. The key elements of a successful HVAC installation include:

  • Sizing an Air Conditioner/Heater: If a unit is too small for your home, it won’t reach the right temperature. But if it’s too big, it can shut off before air fully circulates or humidity can be kept under control. A contractor will include the square footage of your home, the placement of doors and windows, and the sun angle in relation to your home when performing a load calculation, among other factors, to determine the optimal unit size.
  • Equipment Placement: An AC or heater must be placed where there’s sufficient room for it and where any noise it makes won’t disturb people in living areas or bedrooms. Outdoor units can be especially noisy. Therefore, plan where you’ll place them before the contractor arrives. The thermostat should be installed away from drafts, ducts, and appliances that can create false temperature readings.
  • Ductwork Installation: A new central HVAC unit can sometimes be installed with your existing ductwork. Before doing so, a technician should check the ducts are properly connected and not leaking. If new ductwork is required, the contractor will have to create a floor plan and determine how to complete the installation process with as little disruption as possible. 
  • Energy Efficiency: When evaluating HVAC installation costs, it’s important to consider long-term efficiency. An AC’s Seasonal Energy-Efficiency Ratio (SEER) measures efficiency—the higher a SEER rating, the lower your potential energy costs. Furnace efficiency is measured using Annual Fuel Utilization Efficiency (AFUE). High-efficiency units are 90% AFUE and higher, while 80% AFUE is standard.
  • Cost: The cost of HVAC installation depends on the size of your home, the condition of ductwork, and the quality of your insulation and electrical system (modifications will increase installation costs). The type of equipment, the brand, labor rates, permits, and disconnecting/removing old units also factor into the total cost of the project. Higher efficiency systems, tax rebates, and utility rebates can potentially recoup some of the cost of installation.

HVAC Repair

The peak of the heating and cooling seasons is when HVAC technicians are in the highest demand. An HVAC unit should not be opened, repaired, or tested by anyone other than a trained specialist. When there’s an AC or heater issue, you can:

  • Check for and replace a dirty filter
  • Make sure air vents are clear and open
  • Remove debris from the outdoor unit
  • Check the thermostat settings
  • See if a circuit breaker tripped 

However, other issues will require an HVAC services professional. Some of the most common types of repairs to call a contractor for include:

  • Refrigerant Leak: Refrigerant absorbs heat from inside and releases it outside. A lack of refrigerant or a leak can cause the system to malfunction. Signs of a leak include increased cooling costs, warm air blowing from vents, increased indoor humidity, and hissing noises from the outdoor unit. To fix a leak, a technician may repair or replace a coolant line and then follow a delicate process of adding more refrigerant.
  • Condensate Drain Problem: Your HVAC unit produces condensation that the condensate drain line transports away. If it backs up or the drip pan overflows, moisture can damage the system and your home. A float switch may shut the system off. Call for help if water leakage, mold growth, or odors occur. Your local HVAC services company can unclog the drain trap/line or make repairs as needed. 
  • Damaged Compressor Fan: The fan helps release heat into the outside air. A malfunctioning fan can impede the heat transfer process, causing the compressor to overheat and shut down. If you don’t feel hot air releasing from the outdoor unit, it makes unusual noises (screeching, banging, clicking, etc.), your home isn’t getting cool, or the circuit breaker keeps tripping, the compressor may need to be repaired or replaced.
  • Frozen Evaporator Coil: Ice can form on the coil if airflow is limited. The underlying cause can be a dirty filter or a blocked return duct. You can try to thaw the coils by running the system in fan mode. If the filter is dirty, change it and allow the coils to thaw. However, this is a good time to schedule preventative maintenance and have a technician check the system for any hidden issues.
  • Furnace Repair: If your heating system is blowing cold air, temperatures are uneven, the unit is noisy, utility costs are high, or the thermostat doesn’t work, call for help. Furnace problems range from poor connections to faulty ignitors, burners, and cracked heat exchangers. These can be an immediate safety issue, so don’t delay calling for help. A professional can resolve the issue to restore heating, avoid a fire, and prevent carbon monoxide exposure.

Other benefits of professional HVAC repair, installation, and maintenance, aside from improved comfort and safety, include increased efficiency and the potential for a longer equipment lifespan.

Contact Grasshopper Heating, Cooling, Plumbing & Electrical

We are a trusted HVAC maintenance, installation, and repair company in Clifton Park, NY, and we help keep customers’ AC and heating systems in top shape. Our technicians are trained and experienced; they can address any need or issue, whether the project is big or small. They are available 24/7 in case of an emergency. In addition, our HVAC maintenance plans help reduce the need for repairs and improve reliability and efficiency. To schedule HVAC services in Clifton Park and surrounding areas, call (518) 252-8145 today.

Grasshopper-Easy-Methods-of-Sealing-Ductwork-Without-a-Professional

Easy Methods of Sealing Ductwork Without a Professional

Sealing ductwork without a professional is possible through a few simple methods. It can allow ducts to more effectively distribute cooled or heated air. Ductwork sealing and repair are part of our indoor air quality services at Grasshopper Heating, Cooling, Plumbing & Electrical. Professional service can save you in the long run if the issue is substantial. However, if there are just minor leaks in, for example, attic ducts, you can try sealing ductwork yourself to improve comfort, indoor air quality, and energy efficiency.

Here are some easy methods if you want to try DIY duct sealing:

Locate the Air Leak

The first step is to identify the source of a suspected leak. Attic ducts are prone to leakage, so this is the best place to start looking. Ductwork may have been run around joints and bends, leaving it susceptible to damage, or it may have been neglected for several years.

If you find rusted, crushed, kinked, or chewed ducts, it’s time to call a professional. But easy ways to spot a leak include:

  • Place a smoke pen near a duct; if the air is escaping, the smoke will blow in one direction.
  • Spray soapy water on ducts; bubbles will form if air is rising from inside the channel.

How to Seal a Leaking Air Duct

Here are the most common ways homeowners can seal air ducts and minimize leakage:

Duct Tape

Do not use standard duct tape to patch leaky air ducts. It’s not effective for sealing ductwork and will peel away due to temperature changes. Oriented polypropylene tape and aluminum foil tape are much more effective and can be bought at a local hardware store. For the best results, look for a tape rated for use with HVAC systems. For example, foil tape is wide enough to cover gaps and can remain fixed for some time.

The tape is easy to apply. Just take a roll and wrap unsealed duct connections, spaces, seams, and cracks. Any foil or tin tape that is rated by Underwriters Laboratory (UL) is approved for duct sealing.

Duct Sealant

Avoid using duct seal, which is intended for spaces around electrical wires and conduits. Duct sealant is a thick, pasty, paint-like material you can apply directly to cracks and gaps in ductwork. There are a few ways to apply it. You can scoop it out of a pail and apply it directly with a paintbrush. Or, you can use a caulking gun to place the sealant on the desired area. 

Water-based sealants are easy to clean up and hold up well. Mastic duct sealant provides a tighter seal and a more permanent solution. Also applied with a paintbrush or caulk gun, it hardens on the duct and is difficult to remove. Therefore, consider whether the duct will need to be cleaned or disassembled in the near future. 

When applying mastic sealing, remember to clean the affected area, wear gloves and long sleeves, and wear a mask (especially if no fresh air is available).

Should I Call a Professional for Sealing Ductwork?

The two options above are easy ways to stop air leaks. But they’re not always the most practical or effective, especially if you can’t access leaky ductwork. Even if you sealed a leak or two, there may be one you can’t see. A professional has the tools and methods to successfully seal your ductwork no matter where it’s leaking from.

Aeroseal is a proven method that doesn’t require physical access to the leaky duct. It also doesn’t require removing drywall. The product can only be applied by a trained professional and is suited for any kind of duct. To use it, the technician will find one access point to inject a liquid rubber sealant. As it’s distributed throughout the duct system, it will automatically fill any holes, cracks, or loose connections.

Sealing ductwork will keep the air in and dust out. This applies to both supply and return air ducts anywhere in your home. 

Contact Grasshopper Heating, Cooling, Plumbing & Electrical

There are a couple of DIY duct sealing methods that won’t cost you much. While they can do the job for a while, a professional can offer a more permanent solution. Leaky air ducts can cause a variety of indoor air quality issues in your home. However, we can find the source of the problem and determine how to resolve it. For more information on sealing ductwork and other ways we can help, call Grasshopper Heating, Cooling, Plumbing & Electrical at (518) 241- 1762 today.

Safe-DIY-Heating-Maintenance-Tips-for-This-Season

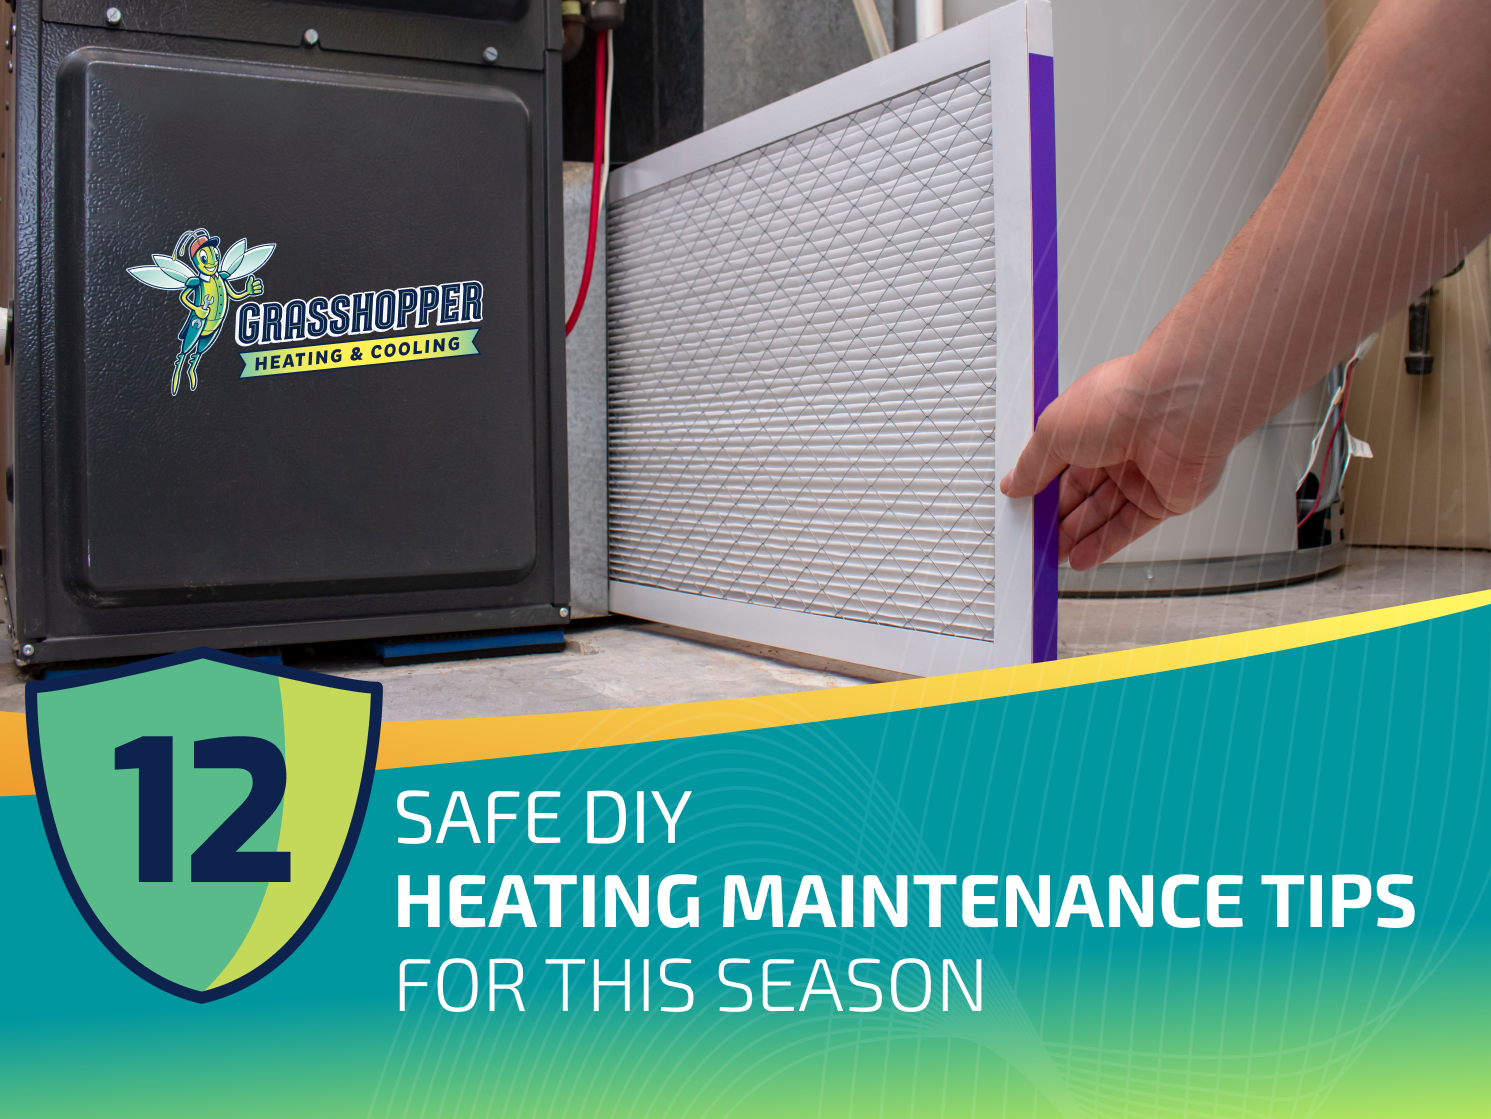
12 Safe DIY Heating Maintenance Tips for This Season

There are many DIY heating maintenance steps you can take in addition to scheduling an annual furnace tune-up. The combination of professional check-ups and general upkeep throughout the year will increase your furnace’s performance and efficiency. Here are 12 DIY tips to help your heater remain in peak condition:

1. Properly Clean the Air Filter

Disposable filters should be replaced at least every three months. When you check the filter, look for dust or if the media is covered in a dark gray or black material. High-efficiency particulate air (HEPA) filters can last six months; some high-end ones can remain efficient for up to a year. Regardless of the filter you have, not cleaning or changing it will reduce airflow, make it hard for your furnace to provide heat, and impact indoor air quality. 

2. Install the Right Filter

Check with your local heating maintenance contractor, a hardware store, or the user manual to determine the right filter to use. Depending on the furnace model, the filter size and type can vary. Installing the wrong one can damage your furnace and HVAC system.

3. Clean the Inside of the Furnace

Cleaning inside the unit is simple. Remove the cover and use a vacuum cleaner with a hose attachment to clean loose dust, dirt, and debris from the base. Also, use the vacuum to clean crevices, gas burners, and the tops of ducts, pipes, and conduits leading into the unit. Vacuum the floor surrounding the furnace as well. If especially handy, attach a ½-inch drain line to the vacuum hose to clean out the burner and blower cavities.

4. Check that the Burner Flames Are Blue

With the cover open, turn on the furnace and raise the temperature on the thermostat. The burner flames should be blue. If they’re yellow or any other color, there’s a combustion problem and you should call for help right away.

5. Clean the Flame Sensor

The flame sensor should slide out easily from its bracket. If it’s coated in residue, the furnace may not ignite. Use a fine emery cloth to clean the residue off gently. Then slide the flame sensor back into place.

6. Blow Dust/Dirt off the Pilot

A drinking straw doubles as a handy tool. Direct it at the pilot and blow into it to remove dust from the area. If the pilot is dirty, a flame sensor or thermocouple can falsely read that it isn’t lighting.

7. Dust the Hot Surface Ignitor

If you have a newer furnace with a hot surface ignitor, carefully detach the ignitor element and hold it by the base, or depending on the model, leave the ignitor in place. Touching the metal or the spark wires can leave behind skin oil that can damage the part. Use a scuff pad to gently clean the metal surface.

8. Check for Drive Belt Wear

If your furnace has a belt-driven blower, the belt may occasionally need to be adjusted or replaced. When inspecting the belt, check if it’s cracked or frayed. You can try tensioning a loose belt if you know how, but it’s best to let a professional make any adjustments or repairs.

9. Declutter the Area Around Your Heater

Don’t store boxes, containers, tools, or toys around the furnace. Clutter can cause the unit to run inefficiently and make it hard to access. This may not sound like furnace maintenance, but it can go a long way in helping the system work better.

10. Vacuum Air Registers and Return Vents

Removing dust from registers and vents is an effective way to help your furnace run smoothly. Any type of blockage can restrict airflow and cause all kinds of trouble. Also, make sure no furniture, storage cabinets, or toys are covering these openings.

11. Adjust the Dampers

The ductwork serving both your heating and cooling system may have dampers that need seasonal adjustments. The markers on dampers or duct walls will show you how to adjust them. Moving the damper handle on the supply trunk enables the system to deliver more warm air downstairs in winter or more cold air upstairs in summer.

12. Replace Thermostat/Carbon Monoxide Detector Batteries

If your thermostat is battery-operated, change the batteries at least once a year or if the unit doesn’t respond to commands or the screen doesn’t light. A malfunctioning thermostat can cause your heating system to be ineffective. Also, remember to change your carbon monoxide detector batteries. This safety feature doesn’t improve furnace performance but will alert you if toxic gas is present and there’s a potential furnace problem.

Contact Grasshopper for Heating Maintenance

Grasshopper Heating, Cooling, Plumbing & Electrical provides professional furnace tune-ups in Clifton Park, NY, and surrounding areas. Filter replacement, coil and burner cleaning, electrical wiring checks, thermostat calibration, and an air pressure and start-up check are included in our maintenance program. The preventative measures our NATE-certified technicians take can protect your home and help your furnace last longer. Call (518) 254-8263 to schedule service.

7 Tips for a Successful Heating Installation

7 Tips for a Successful Heating Installation

A successful heating installation can be achieved with some diligence. We recommend following the tips below and not waiting until winter (or for your furnace to fail) to replace the unit. As you’re considering furnace replacement, having the right knowledge and making sound decisions can make your investment worthwhile for many years to come.

Here are 7 tips to help make that a reality:

1. Know What System You Currently Have

Gather as much information as possible about your HVAC system. Heating installation will go more smoothly if all the components match. Otherwise, the project will be more complex. You may also deal with equipment issues and costly repairs and replacements later. 

If you’re replacing your existing furnace with a similar one, the project will be simpler than, for example, replacing a gas furnace with an electric one or a heat pump. Once the contractor has all the information they need, they can make suggestions and explain the most practical and affordable options.

2. Pick a Reputable Heating Installation Contractor

An experienced professional should always handle the project. Whether you plan to have a gas, oil, or electric furnace installed, ask the contractor about their familiarity with it. Each type of heating system has specific installation requirements. For example, a gas furnace requires secure natural gas connections and a functional ventilation system.

The right contractor will provide you with affordable options that are best suited for your home. As you compare estimates, don’t assume the cheapest is the best. Saving money upfront can cost you more later, especially if your furnace is not installed properly. Also, consider any recommended add-on options. A reputable furnace installer can provide humidifiers and whole-home air purifiers to meet your individual needs.

3. Establish a Rapport with the Company

If you’re looking for a new heating contractor, don’t consider the installation a one-time exchange. You may need someone to fix issues in the future. Or, a professional’s advice and answers can prove highly valuable in keeping your furnace in top shape. 

A long-term relationship will mean the company knows your system and the repairs and maintenance services it has had. You won’t have to depend on a stranger when a problem arises. Instead, someone you can trust will show up and help save you money.

4. Purchase a Brand-New System

Don’t try to save on heating installation by having a used furnace installed. While installing a new unit is more expensive, a used model may develop problems sooner and require costly repairs. It will also be less powerful and less efficient. Aside from a higher cost of ownership, you’ll have to buy another furnace before you know it.

5. Make Sure the Unit Is the Right Size

Sizing a furnace is one of the most important parts of the installation process. The required heating power of the unit depends on your home’s square footage, insulation, climate, and other factors. Too small a furnace won’t heat your home effectively. It will also work harder and wear out sooner. Installing too large a unit can lead to problems as well.

6. Get a Warranty (If the Unit Doesn’t Come with One)

Most furnace manufacturers include a warranty with your purchase. Be leary if a unit is not warrantied. Heating system warranties range from 5 to 10 years and cover most repairs and defects. Purchasing an extended warranty can lead to longer-term savings, especially if an unexpected event or equipment issue results in needing major system repairs or a replacement.

7. Sign Up for a Maintenance Plan

Reputable heating installation companies offer maintenance plans that include annual inspections, cleanings, and tune-ups. Routine care helps your furnace run more efficiently and can extend its life by years, saving you thousands of dollars. Annual membership plans can also qualify you for discounts on repairs, priority scheduling, and lower fees for emergency services.

Schedule Heating Installation in Clifton Park, NY

The experienced technicians at Grasshopper Heating, Cooling, Plumbing & Electrical are NATE-certified and familiar with all makes and models of heating equipment. We ensure each unit is properly sized and installed to save you money over the life of the system. For a free estimate on furnace installation and replacement, contact us online or call (518) 241-1762.